Tuesday, March 22, 2016

Progress on the Crown

I made some progress last night, completing the next section. I'm having some problems getting it to curve as I wish, but I'll just have to see how it does after I add the center piece. I haven't attempted to block anything yet.
The teardrop-shaped beads in this upper section are actually a very soft pink, though they look rather brown in this photo with the black background. This is an adaptation of Gale Marshall's Queen Mom Memorial Crown.

Monday, March 21, 2016

More Lene Bjorn Snowflakes and WIP progress

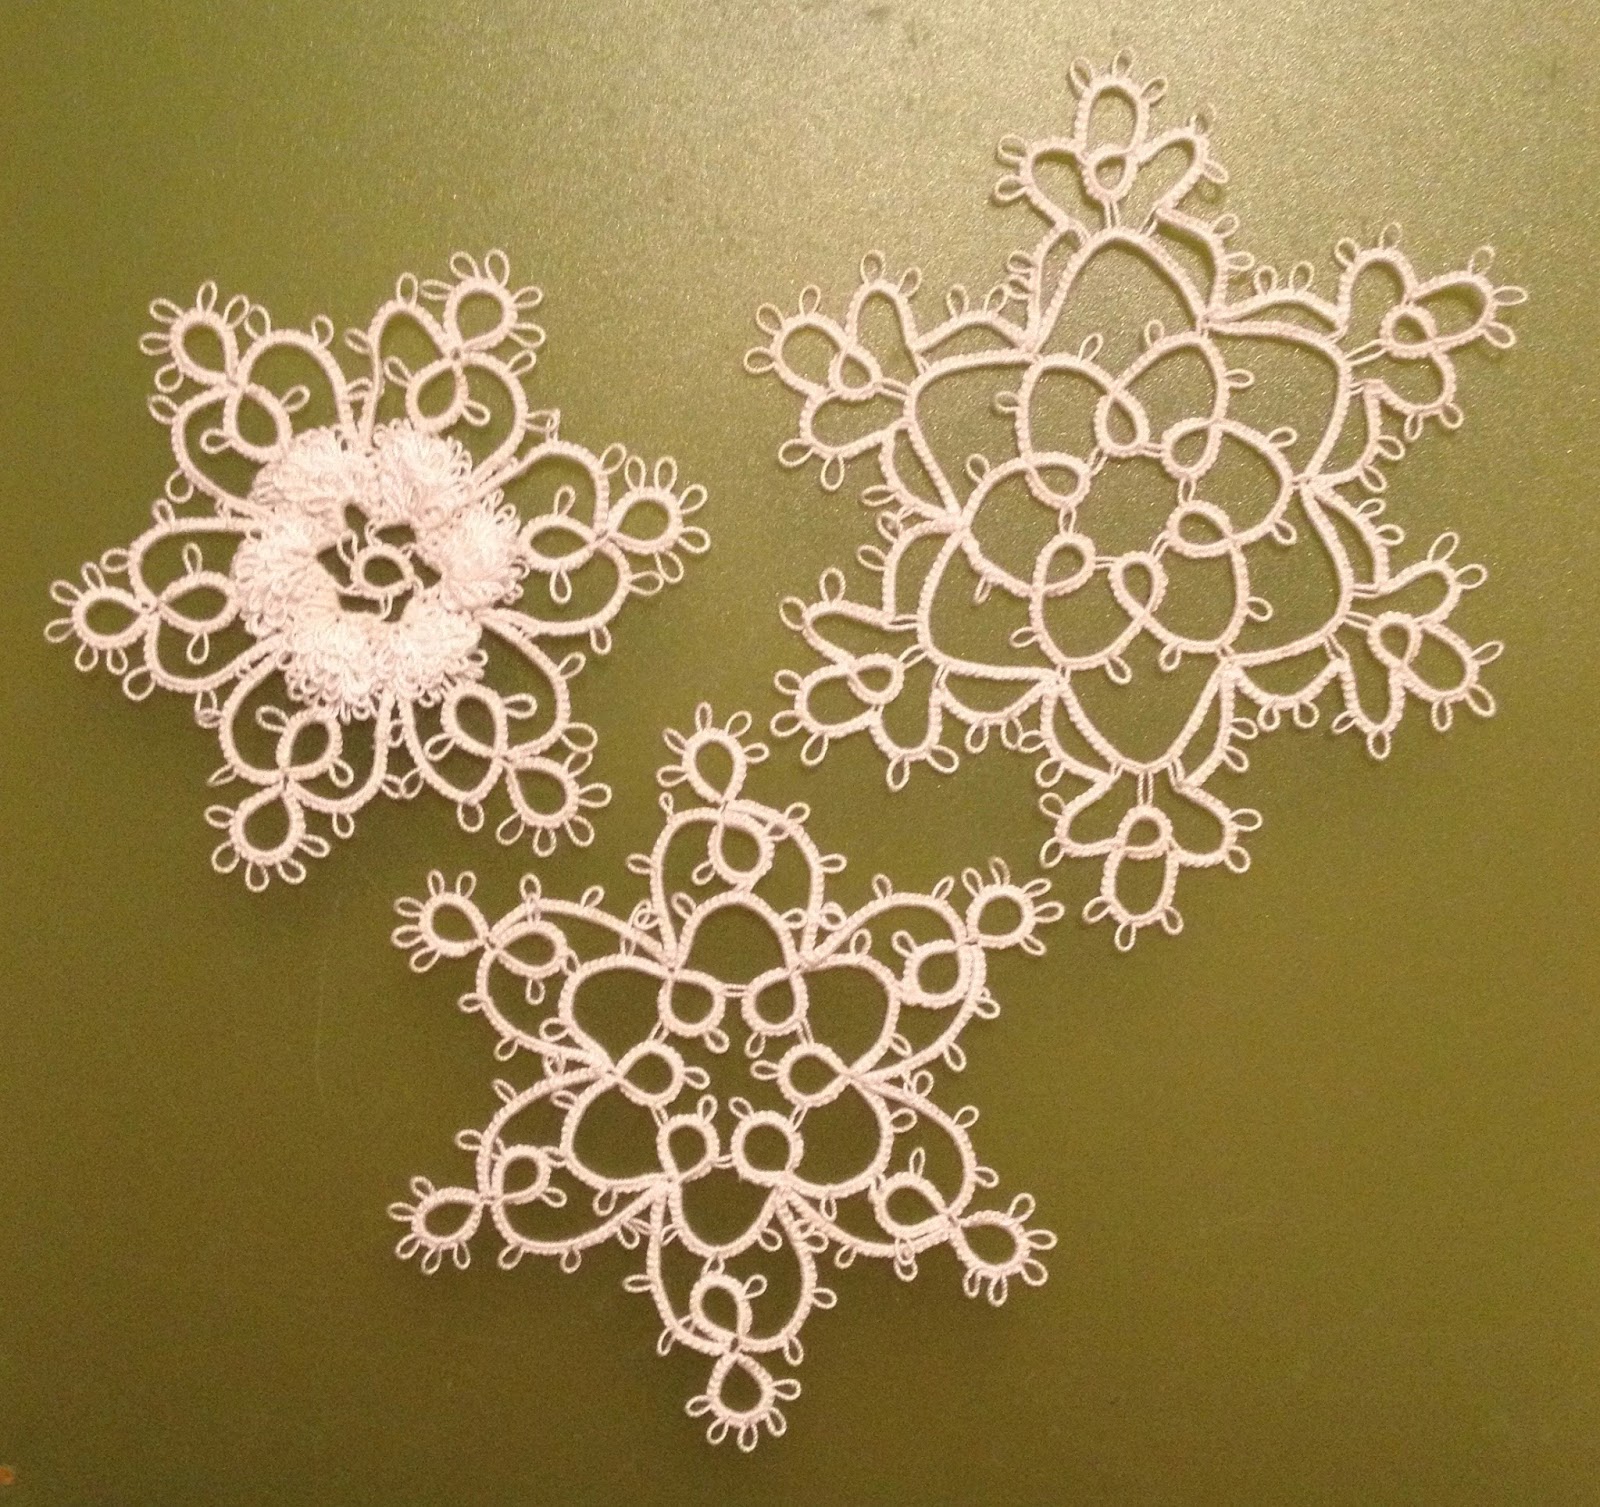
December 1 and 2 are done. I need to do a better job of blocking, but I plan to wash all of them before the final blocking. Join the Craftree challenge to tat all 24 snowflakes in 2016. I'm considering these to be motif #5 and #6 for the 25 Motif Challenge.
I'm starting over on the Norma Benporath Mystery Cake Doyley. While I love Finca size 16 perle cotton and it was looking wonderful, it was proving too fragile for me for this project. I'm beginning again with DMC size 80 in the closest color I have on hand.

Now I'm off to work on the crown this evening.

Happy tatting!

Sunday, March 20, 2016

The fairy tale tatting was finally framed

I'm not quite ready to post images updating my works in progress, but I remembered that I hadn't shared an image of the tatting I did for my granddaughter's bedroom. We finally got it framed and hanging on the wall. Thumberlina (that's how it is spelled in the book) and the Princess and the Pea are from 12 Tatted Fairy Tales by Inga Madsen. Pegasus and the Unicorn are in Flights of Fantasy by Martha Ess.

I hope to have pictures of the WIPs in a day or two.

Saturday, March 19, 2016

Element-al Approach Update & Links Corrected

I'll post some updates on some of my tatting later this weekend, but I wanted to get these corrections up right away. Many thanks to Don who emailed me for permission to view the documents. Had he not alerted me to his difficulty in accessing them, I would not have discovered I had shared the wrong links. I went ahead and updated the documents while I was at it, so the links on my Techniques page should take you right to them.

Monday, March 14, 2016

Crown Progress & Element-al documents updated

The only image I have available to show you today is one of a work in progress. It's Gale Marshall's Queen Mom Memorial Crown. I wanted to do quite a bit of bead substitution, so I decided to tat the crown in parts. It made figuring out the bead placement on shuttle and ball threads a little simpler. This is all I've completed so far on the lower part of the crown. I'm using DMC Cecelia size 30. I had a special request for this crown and I've got 2 weeks to finish it. It isn't the kind of thing I can work on with the baby around, so I'll be working on other projects at the same time.

I finished the tatting of the December 1snowflake (see previous post), but it isn't ready for a photograph.

I've updated the links to the 2 Element-al documents. Be sure to email me or post here at the blog if you have any recommendations for additions or changes to these. You'll find the links on the Techniques page of this blog.

Friday, March 11, 2016

This one doesn't count


I sometimes have to remind myself of the great piece of wisdom I heard a number of times on the old Lace@Arachne.com mailing list. (I know, I'm dating myself as some of you won't have a clue what that was.) "Small imperfections are proof the item is handmade." 

That worked for me with this lovely snowflake (December 1 in Lene Bjorn's 24 Snowflakes in Tatting) when I realized I had added an extra picot to one of the large outer rings. So I pressed it and got it all ready to photograph. I've admired it several times since I finished it late last night. It's a beautiful design. So I'm handling it again, trying to decide whether to post it today or wait until I finish December 2 when I spotted it. Oh, no! I skipped one of the small rings that leans against those large outer rings. Now that's just too much. It's a good thing I really enjoyed tatting this one, because I really must do it over. 

So today's snowflake doesn't count toward any of the challenges. It's a sample of what happens to all of us now and then. Proof to my future tatting students that I really do make my share of mistakes. ;) 

Thursday, March 10, 2016

4 motifs to start the 25 Motif Challenge

I seem to be in the mood for challenges lately. I've been battling severe asthma for over a month and now have bronchitis. Sitting and tatting is one of the few things I really feel like doing. It is restful and productive at the same time--a wonderful combination.

Sharon's 25 Motif Challenge is one of my favorite blogs to follow. It helps me find the blogs and webpages of other tatters. Of course, I want to follow all of you! It has been years since I participated  in the challenge myself, but this seemed like a great year to jump back in.


My first 3 motifs for the 25 Motif Challenge are also my first 3 motifs in the Craftree challenge to tat all of the snowflakes in Lene Bjorn's 24 Snowflakes in Tatting this year. I'm using white DMC Cecelia size 30. These are December 3, 4, and 5. Since the challenge started at the first of the year, most of the participants are working on December 5 or December 6. I decided to start with the #5 snowflake as that is the one I'd have been working on in the first half of March if I was on target. Then I started working backward to catch up as I have time. I'll get December 1 and 2 done as I get time, but I'll keep moving forward through the rest of the book on schedule. At least, that's the plan.

Lastly, I want to share another Ice Cream Cone as an example of working a mistake into the design. When I went to join the third ring of the outer round to the center square, I joined to the wrong picot. Rather than take out that ring, I just increased the number of rings and chains and made sure the 2nd side mirrored the first. Most likely only another tatter would notice that it differs from the original design. The pink thread is a Manuela size 20 I had on hand and the cone is more of the Altin Basak size 50.


Tuesday, March 8, 2016

5 Tatted Ice Cream Cones


This is a pattern that I enjoy tatting. I load the ice cream thread with 14 to 16 beads for the square, placing 8 of those on the shuttle. I load 16 to 20 for the outer round with 8 of those again on the shuttle. I then place them randomly as I tat. I used size 20 thread for the ice cream--DMC Cecelia white and brown, Manuela pink. The cones were tatted with some Altin Basak size 50 that I had on hand. In spite of the size 50 on the label, I find this thread to be somewhere between DMC Cecelia size 20 and 30 in size.

Sunday, March 6, 2016

Oops! Can't salvage this one.

When I use the Magic Thread trick to hide ends, I usually wait until I've joined at least one more round before I snip the ends. This time I slipped into production mode to make several Valeire Square Ice Cream Cones and didn't give it a thought as I did the finishing of all of the first rounds before starting the second ones. You guessed it. On number 5, the ends came loose as I was working round 2. My nimble-fingered daughter tried to salvage it by making a knot with those tiny ends, but instead we managed to pull another double stitch off. Maybe this will help me remember in future to wait until the project is finished, or at least until another round or two has been added, before I snip those ends.

Thursday, March 3, 2016

Dorothy Edging - more Christmas 2015 projects

While I'm working on the Benporath mystery project, I'll share some more of my Christmas 2015 tatting.

I have lots of patterns and patterns in books, but sometimes you get an idea in your head and just can't find anything that fits just right. That's the story behind this edging. I wanted something dainty and open, sort of a stained glass window look. So I finally picked up shuttle and thread and started tatting. It fell into place perfectly. The thread is size 30 Cecelia.

Attaching my tatting to anything with needle and thread is a real challenge for me and causes hours, in this case days, of pain afterward, so please don't judge my sewing too harshly. I'm just thankful I managed to get it attached at all.

I call the pattern Dorothy in honor of my mother for whom I designed it. I'll try to work up a pdf of the pattern for you in the months to come, but I'm committed at the moment to another project for my granddaughter with only a few weeks to get it finished. Meanwhile, enjoy the pic.

Wednesday, March 2, 2016

Mystery Tat Along - Norma Benporath Round Doily

I've got to purchase some beads before I can start the project with the next deadline, so I'm reluctant to return to my big project for myself. I just can't get excited about starting it just to put it back down again for a more urgent project.

Looking for something to occupy me in the meantime, I stumbled across the second Benporath Mystery Tat Along in Craftree and decided to jump right in. The pattern is at http://www.craftree.com/patterns/5557

I finished the medallion that goes in the center of the fabric circle. Now to start the edging that is supposed to mount to the outside of a fabric circle. I'm working with Finca size 16 perle cotton. It has been ages since I've worked a project with it. It didn't take many double stitches to remind me why it's one of my favorite threads. (And, yes, that's a dab of Fray Check on the join. I was feeling lazy and tatting for myself. I confess I find it a wonderfully useful shortcut now and then.)


Tuesday, March 1, 2016

Additions & Updates to MyPatterns and More December 2015 tatted presents;

I've updated the links and added a few patterns to My Patterns. The newly posted ones are patterns I've shared in the past, many of them ages ago. Be warned! I have not updated the instructions. They reflect what I knew how to tat and what I knew about sharing my patterns at the time.

Here is a picture of some red ornaments I made for my niece using size 30 Cecelia thread. I apologize this isn't the best picture of the tatting, but as usual I was scrambling to get everything pressed, stiffened, and wrapped up at the last minute.
All three patterns are by Pam Palmer. 
*Santa's Sleigh is on page 8 of Tatting Treats (1994).
*Rocking Horse is on page 4 of Tatting Treats Two (1997).
*Teddy Bear is on page 10 of Tatting Treats Two (1997).


Sunday, February 28, 2016

Element-al Approach to Designing

I've finally made some progress on a project I've wanted to do for ages. It's a resource for those of us who want to design tatting. If you think about it, tatting is made up of ring shapes (usually a ring), curves (usually chains), and straight lines (traditionally the bare thread). So with those basic elements in mind, what can we substitute or modify to get a new look? Georgia Seitz is going to share my handouts in the online classes tomorrow. I invite you to visit the links she has provided at http://www.georgiaseitz.com/2016/2016index.html and even attend one of the class sessions if you can. I value your input, so email me or post here if you think of something that should be added. It is a resource I want to make freely available to all, possibly even in a format that you can modify to reflect your personal preferences. One handout contains ideas for modification or substitution. The other includes links to techniques and patterns for practice or example. In some cases, there are lots of sources for the technique, and my document can't reasonably include them all. For that reason, I'm thinking it might be good to make it customizable. I'm still thinking. Remember it's a work in progress.

An Element-al Approach to Tatting Design*

*Please note that I've changed this link to take you to my Techniques page. I will keep the links on that page of my blog connected to the latest version of these handouts. The pdfs will eventually be replaced with Word documents that you can customize for your own use.

December 2015 Tatted Presents

Wow! Where does the time go? The older I get the faster it seems to move.

I hope you'll think better late than never as I update you with what I've been working on in the months since my last post.


*I designed the two button bookmarks, but they are a simple combination of rings and chains.
*This cross by Jackie Fiuntini of New South Wales is a favorite go-to piece for me. It was published on page 3 of Tatter Tales, Volume 3, Issue 3.
*The little fairy with the wings is adapted from a combination of the features I liked best in Teri Dusenbury's Pincess Bijou Fairy and her Princess Dorie Fairy. Both original patterns were printed in her Tattle Tales newsletters. Princess Dorie is available online along with a few of her other Papillon Princesses at http://teridusenburystattletales.blogspot.com/2014/09/tatting-bookmarks-papillon-princess.html, but I don't see Bijou among them.
*The Bird of Paradise Bookmark is from page 29 of Dianna Stevens' Animal Bookmarks, A Tatted Zoo (2004).
*The hanky edging is Eternity Rings by Mary Konior. You'll find it on page 26 or Tatting with Visual Patterns (1992).

I designed an edging for another hanky when I couldn't find a pattern that seemed just right. You'll see it a bit later along with a picture of the fairy tale tatting finally up for display in my granddaughter's bedroom. It took us forever to find the ivory velvet I wanted for the backing.

Happy tatting!

Saturday, October 3, 2015

Norma Benporath Mystery Edging

The tatting is done, but I haven't pressed it yet. The outer round has a ruffled effect at the moment which I think is quite attractive. It has been lots of fun to tat.

Monday, September 28, 2015

Sharon is teaching design classes through her blog

I took Sharon's design classes quite some time back. She did a great job and now she is teaching through her blog with a new lesson every few weeks. So, whether you already love designing or have never even imagined that you could, I encourage you to drop by Sharon's blog to check this out.

Sunday, September 27, 2015

Benporath Mystery Edging update

Hello, everyone. I've completed the tatting of round 2 so that the foundation round of squares now has a completed round on either side. Norma's instructions have you tatting this outer round with ball and shuttle, but it is obvious that some of the rings must swing out for joining to the next and final round. I chose to tat with ball and shuttle just leaving these rings free and then folding them up and out because I felt the resulting sharp v-shape of the chains might have been what Norma had in mind. If I had chosen to tat with 2 shuttles and make these outward facing rings with the 2nd shuttle, the chains would have had the more traditional curved shape. That just isn't what I hoped to achieve.
This would be a lovely place to stop. Several of my family members thought it was finished. It will be interesting to see what effect the final round will have upon the overall appearance. The last round should produce a scalloped look and I plan to work it in the variegated thread I used for the foundation round of squares.

Saturday, September 19, 2015

Update on the Benporath Edging

It has been hard to find time to tat, but I have really enjoyed working on this edging. I've finished the inner round (Round 1). Norma's instructions have you making two consecutive joins to connect to the corner picots between two motifs. I chose to interpret this by completing the 2nd half of the DS after the first join before making the 2nd join and I really like the effect (see the closeup). This actually results in a ring with one more double stitch than the other rings on either side of it.

I've done a practice tat of the next round (Round 2) and have just begun to tat onto the foundation round.

Friday, September 11, 2015

Benporath Mystery Edging

It's been a distracting week and I find comfort in relaxing with an audible book and my tatting this evening. I'm reluctant to log in to Craftree as I really want to work this pattern out for myself without seeing what the others have done, and I'm sure someone else has finished it by now. As you can see, I've just now completed the first round. I look forward to figuring out the next round this evening. It has been a real pleasure to work with DMC size 80 tatting thread. This piece hasn't been blocked as I am away from home.

Tuesday, September 1, 2015

Tatting Benporath Mystery Tat-a-long

Hi, everyone. I'm having problems finding cream-colored velvet for the framed tatting I've completed for Butter Bean. I had hoped to share the finished images with you, so that must wait a little longer.

Thanks for the help to get back into Craftree (InTatters). I was trying to figure out what to do next and dropped in just in time to start the Mystery Tatalong of one of Norma Benporath's edgings. The only image available is so poor that none of us can make out any details at all. I tatted one of the foundation squares and started building the foundation round. This pattern is unique from all others I've ever tatted in that the next round will be worked to the inside of the square formed by the foundation round. I look forward to seeing how it will turn out. I'm working in a colorful size 80 thread as I was ready for a change from all of that solid pink size 30.


Nothing has been blocked or pressed. These are in-progress scans.

Sunday, August 23, 2015

Tatting Chat communities

I just discovered that InTatters is no longer on CraftTree. I couldn't find it with a search. Are there any tatting chat communities?

Wednesday, July 22, 2015

Still Tatting

Hi, everyone. I'm sorry my posts are so far apart. I'm still working on the tatting to be framed for Butter Bean's room. You saw "The Princess and the Pea" and "Thumbelina," and I've finished the tatting of Pegasus and almost finished the unicorn. Neither of these has been blocked yet so you would not recognize the tatting blob should I take a picture of them. However, I thought you might enjoy seeing Butter Bean (her daddy's nickname for her) modeling a tatted bonnet I made many years ago. It is still a little large, but she'll catch up.

Saturday, April 4, 2015

New Grandbaby

One of my babies had a baby of her own. Three weeks early, she still weighed 7 lb. 5 oz. and measured 19.5 inches long. She was 2 days old in this picture. My joy overflows. But my tatting wan't finished and I've been too distracted since her arrival to form a single knot!

Thursday, March 19, 2015

A potential new tatter

Earlier this week, I had the opportunity to meet clothing designer Linda Rowe Thomas who lives in central Arkansas. When she expressed an interest in learning to tat, I told her about all of the wonderful resources online for beginners and gave her the address of my blog to use as a starting point. You can see some of her designs in her gallery. I look forward to seeing some tatted elements in some of her pieces.

Sunday, March 15, 2015

Thumberlina (or is it Thumbelina) is finished

Picture #2 is complete. Inga calls it Thumberlina, but I know her as Thumbelina. At least, I think it's the same story. I'm glad I decided to wait to select the frames until all of the tatting is done as this one is a little taller than The Princess and the Pea.

Inga Madsen's book, 12 Tatted Fairy-Tales, is wonderful. These two projects were complicated enough that I took time to study the picture and the diagram very carefully before starting to tat. Inga provides large images of the completed tatting for all of the projects which is very helpful.

Flights of Fantasy by Martha Ess arrived yesterday. I'm torn between the Regal Dragon and Knight, the Rearing Unicorn, and the Tapestry Unicorn. I'm going to let my daughter make the final choice. Thanks so much to all of you for your helpful suggestions!

Sunday, March 8, 2015

Seeking a pattern

Hello, everyone. I'm terrible at keeping up with my blog when I'm working, but I do tat a little. Remember the ring pillow for the wedding last May? Well, now I'm tatting pictures for the room of the new baby due in April. I've finished Inga Madsen's "Princess and the Pea" and I'm doing "Thumbelina" from that same book of patterns--12 Tatted Fairy-Tales. But I need a third picture that fits a princess theme. I'm open to suggestions. My daughter suggested a slipper to represent Cinderella, but I can't think of any sources of a slipper pattern. So please post your suggestions for the third picture.

I'll post Thumbelina as soon as she is finished. Sorry about the shadow on this one. Do you see the little green pea?

Saturday, June 7, 2014

Ring Pillow for Daughter's Wedding

Wow, I can't believe how long it has been since I last posted. While I think of all of my tatting friends often, life has been very busy. As you might guess from the title, my most recent project was decorating the ring pillow for my oldest daughter's wedding. The photos are by Grant Dillion. I'm awed by the quality and creativity of some of the photos he took at her wedding.
The pattern is by Yvonne Reypa, April 2007. My copy is from back before I added the weblinks to the patterns before saving and I couldn't find it with a google search. If any of you have the link, please post it. 

This is a beautiful design, but it was very slow going. I alternated finger tatting and shuttle tatting. I do believe it was worth the effort, though.

Monday, May 27, 2013

Package from God's Kid

I took a week off for some fun in the sun on one of Florida's beaches. It was a girls'-only trip with my mother, one of my sisters, and my two daughters. I didn't touch a computer for the entire trip. I spent lots of time enjoying the beautiful view.

Look what was waiting for me when I arrived home! God's Kid sent me beads, size 40 threads, and some lovely embellishments to play with. And look at the doily! The tatting looks perfect! Thank you so much, God's Kid.

Friday, May 3, 2013

Earring Jackets

I've finished two pairs of earring jackets and started another. The photos really don't do justice to the colors of the threads or the beads. The peach and royal blue pairs were inspired by Jennifer Williams' Two-Layered Flower. I used one of my favorite earring patterns and added that second layer using Jennifer's technique.
The one lone variegated earring jacket you see is made from Rachel Colvin Jackson's Simple Celtic Earrings. I left off the picot for attaching a wire and will wear them as earring jackets for post earrings. This one required I get out my tatting needles and refresh my rusty skills. I found it was rather like riding a bicycle. The movements came back to me very quickly. As I write this, I've only completed one piece. I look forward to playing with this one a bit more. 

My thanks to both Jennifer and Rachel. I've enjoyed playing with your techniques and see many possibilities for them.

Sunday, April 28, 2013

New Earrings

I've been distracted from shuttle-tatted interlocking rings and cross patterns by the need for some new earrings. I looked through some of the patterns I've saved from other websites and blogs and found great inspiration. The pair pictured below are based on the Poinsettia Earrings designed by Rachel Colvin Jackson. I confess to taking a few liberties with Rachel's lovely pattern. I didn't want to sew in beads afterward so I made long beaded picots and I substituted double stitches for the half stitches Rachel uses in the outer round. I'm very happy with the result. Thank you, Rachel for sharing this pattern with us.

Saturday, April 20, 2013

Tatting on the road

I apologize for the photo quality, but I thought a poor photo would be better than none at all.

My plans to rework my Celtic cross bookmark with the interlocking rings had to be put on hold. I've been on the road quite a bit lately for work. In fact, I'm out of town now. I chose a familiar pattern and grabbed several balls of Lizbeth variegated threads that I had not yet tried. This proved to be a great choice as I've enjoyed tatting on planes, in airports, in autos (I wasn't doing the driving), and in hotels. Loading one Aero shuttle completely and starting with shuttle and ball, I was able to make two bookmarks before reloading a shuttle.
I didn't completely unpack both suitcases after the previous trip before I started repacking one for this shorter trip. I think I must have left a couple of bookmarks in my other suitcase. By my calculations, I've tatted at least 9.

Happy tatting!

Tuesday, April 9, 2013

Tatted Teddy Bear progress

I finished the Teddy Bear in Inga Madsen's Tatted Animals. The thread is Lizbeth size 20, Purple Marble. He is now framed and proudly on display in my office at work.

Sunday, April 7, 2013

It works!

A few posts back you saw my efforts with part 1 of Kathy's tutorial for interlocking rings with a shuttle. It took me two tries with part 2, but I'm very satisfied with the results. I had a little trouble closing that last ring satisfactorily, so I again removed the thread from the shuttle so I could pull it through to cinch the ring closed. Thank you very much, Kathy. I've place links to your tutorials on my techniques page.
I designed a cross pattern years ago that has interlocking rings in the center. I finger tatted the rings, but that was so fiddly that I've never worked the pattern again. I look forward to giving my design another tat using this method for the interlocking rings.

Saturday, April 6, 2013

Tatted Elephant

I finished Inga Madsen's tatted elephant, pages 16 and 17 of Tatted Animals. The thread is Elizabeth size 20 in Seashell. I've started the Teddy Bear on pages 30 and 31. You'll see it a bit later. Inga's book contains a picture and a diagram for 12 different animals. The others are a bird, butterfly, sitting cat, dog, giraffe, horse, ladybird (ladybug), monkey, snail, and a squirrel. All of them are adorable. Inga used these designs for a quilted baby blanket and includes some instructions for doing the same. I'm tatting the animals just for fun, with no particular plans for how I'll use them. They are just fun to make.

Sunday, March 31, 2013

Happy International Tatting Day!

We are just 3 minutes away by my time, but it has already begun in other parts of the world. I wanted to do something special for all of my tatting friends and promote the art of tatting at the same time, so I'm offering you a pattern today. It offers a chance to practice Catherine Wheel joins if you wish, along with half-stitches, split rings, and a little block tatting. The sample was tatted with one of Jess's beautiful threads available through her Etsy shop, Tatilicious. The pattern is available here. Please let me know if you have any problems with the pattern.

Saturday, March 30, 2013

Shuttle-tatted Interlocking Rings

If you've been admiring the patterns with interlocking rings, but avoid them because you don't want to use needletatting or fingertatting, you really must visit Kathy Niklewicz's blog post where she has begun a tutorial for making them with the shuttle. I'm sure you can't see the problems in my efforts in the photo below as well as I can, but I'm getting close thanks to Kathy. While the variegated thread shows up better in the picture, the larger white thread has been a better choice for my practice. I'm going to devote my tatting time to working on this technique this morning.

Okay, I'm back with a progress report. I carefully followed Kathy's pictures as I went. At photo 9, Kathy says to keep the shuttle thread behind the closing ring and the first ring as you close that second ring. I tried posting my shuttle through the second ring from front to back before closing the ring and it has made a tremendous difference in the appearance of my finished work. I'm going to go over to Kathy's blog to see if she does this routinely (I know some tatters do so). Below are images of my last effort from both sides.

Tuesday, March 26, 2013

Dragon Wing Doily

This is my second Dragon Wing Doily by Anne Bruvold. I tatted my first one in May 2011. My tension was rather tight this time which made the piece rather stiff and a little more fiddly to block than I expected. This is a tatter issue rather than a designer one. I did not notice this problem with my first effort.  The nice thing about the stiffness is that it would hang nicely as an ornament without stiffener. I'd like to try it again with deliberately lighter tension to see if the difference was in the thread I used or in my tatting. Anne's pattern is a lovely one and enjoyable to tat. You'll find it in English here.

Saturday, March 23, 2013

Wanda's Graduation Cross

I used Wanda's Graduation Cross pattern for this little cross in one of the Lizbeth variegated threads. I got off to a bad start when I made the 3rd of the starting rings a split ring and didn't catch my mistake until I had worked my way around to start the 3rd leg. Oops! I resolved the issue by making a fourth ring for the center with a SCMR. It would have been less obvious in a solid thread, but I feel it was a decent compromise that kept this piece from the trash bin. My photograph doesn't do this thread justice.

Thursday, March 21, 2013

Lost tatting bag & start of an elephant

I was on a tatting roll when last I posted. I finished a cross and got a good start on a Dragon Wing Doily before I got the great idea to take my tatting to work. After a couple of weeks of getting no tatting done during my lunch break, I decided it was best to bring it back home. The moment when I made that decision is the last time I can remember seeing my tatting bag. I have no clue what I did with it and that was well over a week ago!

When I got home last night the only thing I could think of that I wanted to do was to tat. I got out Inga Madsen's Tatted Animals and started Elephant in Elizabeth size 20 Seashell. It felt so good to have a shuttle in my hand again. One forgets how relaxing tatting can be when you don't make time for it for quite a while. So this is my progress so far. I'm going to post this picture and go back to playing with shuttle and thread as I drink my blackberry tea.

Happy tatting, everyone.

Sunday, February 10, 2013

Heart earrings, but no pictures

I carried my tatting with me all week, but didn't get anything done until today. At my daughter's request I whipped up a quick pair of heart earrings for her to use as a prize later this week. No pictures, I'm afraid. I used TatfullyYours' Flower Heart, size 10 Nazli Gelin Garden in a dark red, and gold earring wires. My daughter thinks they'll be a big success.

Have a great week everyone. I hope to have something to post again next weekend.

Sunday, February 3, 2013

Hearts in Lizbeth Watermelon size 20

I tatted these two hearts yesterday. The one on the right is Little Bit of My Heart by Dan the Tatman. The other one is Vicki Clarke's Ruffled Heart. I had a little trouble with the ruffled chains in Vicki's pattern. My stitches wanted to twist around rather than ruffle, especially on the 2nd chain.

Saturday, February 2, 2013

Bad Combination

Complex pattern with no diagram + recovering from dental surgery + migraine headache = ERROR, ERROR! I did not arrange the chains symmetrically as I started down the other side. I decided that I'm really not well enough right now to work on anything that requires this much concentration, so I'm sitting this pattern aside for later. It is a beautiful design and I should make sure I can give it the attention it deserves. So today I'm going to go back to browsing my collection for simpler patterns that will allow me to enjoy tatting without so much concentration.

Happy Tatting

Friday, February 1, 2013

Beeton Cross

Since my first project was by chance a cross, I decided to work my way through some of my cross patterns. This one is super simple. It was inspired by an edging in Beeton's Book of Needlecraft. I don't have a pattern, just notes about ring and chain sizes. I think Georgia Seitz may have shared this idea through the Online Tatting Class at some point.
I'm already working on the next cross, but I've moved to a more complicated pattern. It is Gillian Buchanan's Sharon's Celtic Cross. It is worked with 2 colors and 4 shuttles.

Thursday, January 31, 2013

Thanks for the welcome

Thanks so much for the welcome back. I found your blogs and webpages inspiring yesterday. I didn't even make it to the forums before deciding to find my shuttles. I knew better than to over think it. I could have spent days just deciding what to do. I had run across one of Roger Freedman's cross patterns as I was sorting a few papers earlier in the day. I grabbed the first filled shuttles I put my hands on and started tatting.

This one starts near the bottom. I had worked my way through one side and the top before I realized I had added too many rings to the first side arm. My first thought was to cut it off and start over. (Later, of course. I was easily discouraged, I'm afraid.) However, I talked myself into cutting out and salvaging the project. My choices were to cut out a small amount and lengthen all of the arms or go back to the spot where I added the first additional ring. I chose to do the latter and got it finished before I went to bed last night. It feels wonderful to have started and completed a project. I'm going to find some more shuttles that need emptying and start another.

Thanks for the welcome and the inspiration.

Wednesday, January 30, 2013

Checking in with the tatting community

Hello, all. I know I've been missing in action for months and I've missed all of you. Other things have had higher priorities so that the only tatting I've done was just before Christmas and I didn't take a single picture.

I'm home this week recovering from the removal of a wisdom tooth. I'm feeling more awake today, but still not up to doing much. It seemed like the perfect time to visit your blogs and webpages to see what you've been up to. Now I'm off to visit your sites.

Saturday, June 23, 2012

I'm still tatting

Hi, everyone. I just want to let you know that I'm still around and still tatting. I took a vacation, then got really busy at work, and now my internet portal is down. I'll be back.

Monday, May 14, 2012

Mothers' Day Weekend

It was a weekend of special events for me rather than just one day. If you follow the blog of Jess aka Tat-ilicious, you've already seen some of the pictures from Saturday. We each drove to meet at a pre-determined location to tat, chat, and enjoy some show-and-tell. It was a wonderful day. We chose a McDonald's with an indoor play area so Jess's daughter, Livi, could have some fun, too. I must tell you that Livi is an impressive young lady with a gift for making friends.

I enjoyed seeing and handling Jess's lovely threads and brought home a number of them. While we chatted, I started Marilee Rockley's Ripple Necklace using Jess's Faerie Dust thread and Lizbeth black, both size 20. I made several mistakes, a few of which jumped out at me as I photographed it today. It's a gorgeous design, but perhaps not the best project when one is distracted. Faerie Dust looks really great in Marilee's design though, don't you think?

Jess does beautiful work.  She taught herself to tat and uses very different hand movements from those I use. I enjoyed watching her work. While her movements were different, they were graceful and effective. I've planned for a long time to try Jane Eborall's method for avoiding that blip of color in a join, but never quite got round to it. Jess demonstrated the technique, a much faster learning method for me, so the Ripple Necklace benefited tremendously. Jess also showed me how she does her ring-only heart. When I glanced at the design last week, I had assumed it used split rings. Jess's design is more great evidence that there is more than one way to achieve a particular outcome.

As Jess mentioned, we had a tatting student, too. He handled the shuttle while I held the core threads. Then Jess helped him try it holding both the core thread and the shuttle.

Jess, Livi, and I hope to get together again before the summer is over. If any of you tatters live within a reasonable driving distance of Wynne, Arkansas, we would love to have you join us.


Friday, May 4, 2012

Tatted Bookmark

This is another of my bookmark efforts. I recently shared this one in an exchange. The thread is one by Lizbeth, size 20, but I can't find the color name.

Wednesday, May 2, 2012

Finished the Anne Orr doily

I finished the Anne Orr doily I started several weeks ago. In fact, I finished it before I started playing with Jess's threads, but it needed some pressing before I took pictures. So while I'm playing with more of Jess's threads, I'll try to get a few photos of recent projects posted.
I think it could benefit from a bit of blocking. The outer round looks slightly out of shape. I confess it got tossed about a bit before I got around to taking the picture. The thread is size 20 Lizbeth, Sea Green Dark.