Showing posts with label Valeire Square Patterns. Show all posts

Saturday, July 8, 2017

Doll Sock (or Shoe) for Butterbean

Hi, everyone. I've missed you all so much, and I know I have loads of blog reading to catch up on. Today, though, I thought I'd try to get a couple of posts ready for you to catch you up on what little tatting I've managed to do in the past 6 months.

My last post was a picture of the socks I trimmed for Butterbean. Her cloth doll has a matching dress and really needed a coordinating look for her feet. Those are the oddest shaped doll feet I've ever examined up close. Designing something was a real challenge.

Computer glitches today ate the lovely posed pictures of this doll in her socks. This is one of the in-progress ones I took before I made up my mind about the final ribbon placement, but you can get the idea.
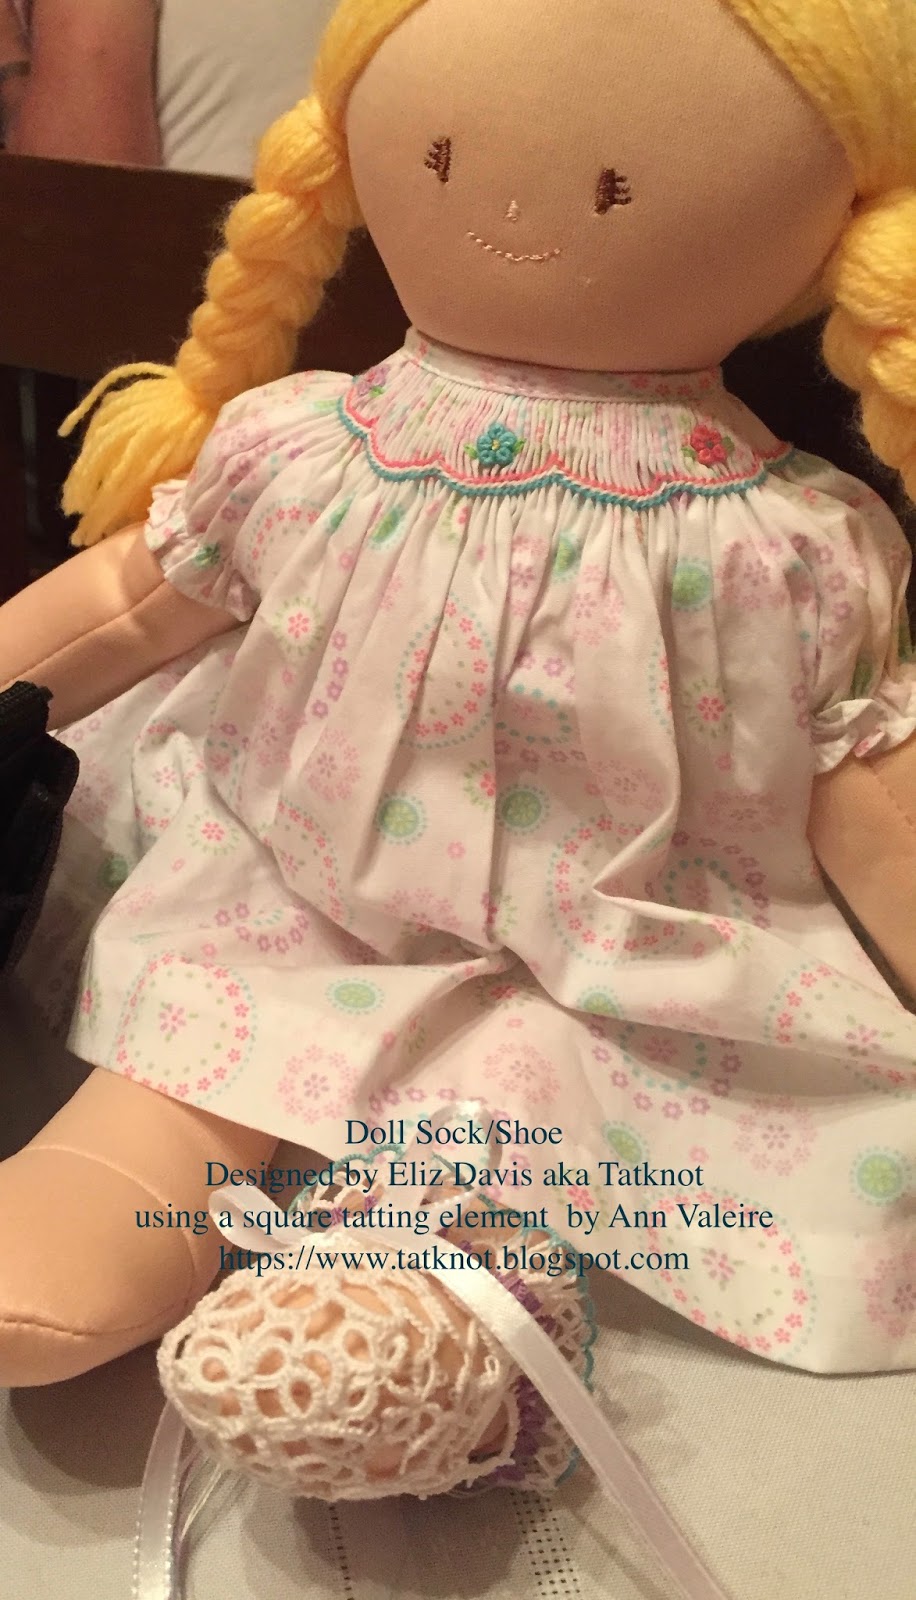
Doll Socks (Shoes)
Motif #5 in 25 Motif Challenge of 2017
Base in Lizbeth size 20
Trim in 2 strands of embroidery floss

I looked at a lot of tatted baby shoe patterns, including my own, for inspiration, but nothing stirred in my brain. I found myself back at the square tatting element by Ann Valeire that I've used in other designs. These squares are the foundation of the top and sole of this design. The sock (or shoe) is tatted in Lizbeth size 20. Then I trimmed it 3/4 of the way around (none in the front) with the same trim I used on Butterbean's socks. 

I don't have any plans to share this pattern. You might say this is a prototype, but there was no time to improve the original design. If Butterbean's interest in this doll holds up, I plan to make another pair that incorporates the notes I've made for improvement of the design. That will be the pattern I hope to share with you. For now, she and her mommy are both very pleased, which helps me be content with this effort for now.

Sunday, March 6, 2016

Oops! Can't salvage this one.

When I use the Magic Thread trick to hide ends, I usually wait until I've joined at least one more round before I snip the ends. This time I slipped into production mode to make several Valeire Square Ice Cream Cones and didn't give it a thought as I did the finishing of all of the first rounds before starting the second ones. You guessed it. On number 5, the ends came loose as I was working round 2. My nimble-fingered daughter tried to salvage it by making a knot with those tiny ends, but instead we managed to pull another double stitch off. Maybe this will help me remember in future to wait until the project is finished, or at least until another round or two has been added, before I snip those ends.

Sunday, May 22, 2011

Working with color for a break

After all of those white doilies, I felt a real need to work with some colors. After starting and stopping a few things, I decided to play with the Valeire Square again. One small doily is drying and a couple more squares are ready for more play. I'll probably work one or two of the designs up in white before I'm done. I find this little square so fun to tat that I keep coming back to it.

Saturday, July 5, 2008

Valeire Square Teardrop & Heart

Over a year ago, Georgia Seitz challenged me to create a heart pattern using the Valeire Square, but my brain just couldn't seem to pull it together. When we came in from our Independence Day activities last night, I suddenly felt inspired to work on it with thread and shuttle as well as paper and pencil. After ditching a few more complicated efforts that I just couldn't get to work, the simple design below was born. It is so simple you may wonder what took me so long! I certainly do.

Enjoy!

Valeire Square Teardrop & Heart by Eliz Davis: One second shuttle ring turns the square into a teardrop. Then two chain segments complete the transformation to heart.


Round 1: (Note that there are NO joins in this round.)
*R 8-8, cl. R 8-8, cl, rw.
Ch 5-5, cl, rw.*
Repeat from * to * until you have 4 pairs of rings and four chains.

Use the alligator join to climb out of round 1 and into round 2.

Round 2: (Note that you are joining adjacent rings together by joining into the picot of two rings at the same time.)
Ch 2-2-2-2-2-2+(join two adjacent rings together)

Without reversing work, tat a ring of 2-2-2-1—1-2-2-2 (to avoid the need for a second shuttle for one ring, I used the shoelace trick before and after the ring)
Ch 2-2-2-2-2-2+(join into the space at the base of the next pair of rings). Continue the progression of chains until you have joined back where you started this round. Finish as desired.

Round 3: Beginning at the second chain join past the ring of round 2, join and make a chain of 2 ds, 18 picots separated by 2 ds, 2 ds. Join to round two opposite the ring. Repeat the chain of 18 picots and join opposite to your starting point. The picture provided will be a helpful guide.

Note: Size 10 thread will produce a heart approximately 3 inches tall and 2 1/2 inches wide.

Wednesday, May 16, 2007

Valeire Square

Patterns based on a square motif from Tatted Yoke No. 4 in Fifteen Tatted Yokes and Camisoles Finished on Satin, Book 9, by Anna Valeire, published by E. C. Spuehler in the early 1900s.

Valeire Square Instructions
(Shuttle and Ball)
Diagram

Round 1: (Note that there are NO joins in this round.)
*R 8-8, cl. R 8-8, cl, rw.
Ch 5-5, cl, rw.*
Repeat from * to * until you have 4 pairs of rings and four chains.

Use the alligator join to climb out of round 1 and into round 2.

Round 2: (Note that you are joining adjacent rings together by joining into the picot of two rings at the same time.)
**Ch 2-2-2-2-2-2+(join two adjacent rings together)
Ch 2-2-2-2-2-2+(join into the space at the base of the next pair of rings)**
Repeat from ** to ** until you have joined back where you started this round. Finish as desired.