I'm sharing my progress as I go in hopes that it will encourage some of you as you begin. It's challenging to do this the first time, and I've probably made it more so because I already had some beads I really wanted to use that aren't the suggested sizes. I haven't taken the time to manipulate all of the rings back into shape before posting, but here it is from the top and the side, but still with artificial light.
Projects and explorations in the world of lacemaking.
Friday, May 6, 2016
Wednesday, May 4, 2016
Front of Morfo Butterfly
The front side of the butterfly is tatted. As you can see, some of the beads are tatted in. I've used pink and dark purple beads so far with this size 20 Flora color #227 (a soft shade of blue). Next will be the addition of more beads with needle and thread.
Tuesday, May 3, 2016
Progress
It's been a busy week so far with very little time to tat. I managed a couple of repeats in the final round of the doily tonight. I also spent some time selecting the beads for the butterfly. Those that will be tatted in are loaded on the shuttle.
Sunday, May 1, 2016
Angela Gambka's Morfo Butterfly
Marie has shared several lovely butterflies that she has made with Angela Gambka's Morfo Butterfly pattern through her blog, West Pine Creations. I've found them inspiring. I've had it on my tatting list for quite a while. Today was the day. Marie has been a tremendous help. I've practiced by just tatting the back piece several times. Here are a few of my efforts. I feel the blue one is good enough to use, so I'm going to load some beads for the top one, which I hope to tat tomorrow evening.
Have a wonderful week, everyone. I hope to have a finished butterfly to share with you before the week is over.
Saturday, April 30, 2016
Doily Progress and a New Tatting Buddy
Deciding upon the color of the next round of the Renulek Spring 2016 WIOSNA doily really wasn't as difficult for me as the first few decisions. I went with all white for this one. The tatting progressed rapidly, too.
While I'm pleased to have made such progress on this doily today, the real highlight of my weekend was meeting and tatting with Scott. Scott found me through the Craftree forum and reached out wondering if I would like to meet. Would I ever! So we met at Barnes & Noble in North Little Rock today, and I was amazed to discover as we left that we had spent three hours sharing our tatting. The time had just flown by! Scott taught himself to tat with the help of YouTube videos. While he has only been tatting a year or less, he is already challenging himself to tat one of Renulek's napkins with size 80 thread. He has accomplished more in that one year than I accomplished in my first several. Scott and I plan to do this again, and we would love to find other tatters in our area who would like to join us. So if you are interested or know someone else in our area who might be, please reach out to me through this blog. Tatting together is such fun!
Wednesday, April 27, 2016
WIP Wednesday
I haven't made a lot of progress on my tatting projects this week. In fact, this evening provided the first opportunity to sit down and indulge for more than a few knots at a time. I felt some pressure to get round 4 of the Renulek 2016 Spring doily done so I made that my first priority.
WIP Wednesday tatting just wouldn't feel fully satisfying without some progress on my Spring 2014 Renulek doily, too. So one more repeat is done in the next to last round. It's not much, but I feel good about moving forward in even this small way.
Now I'm off to bed. Time to rest to prepare for another beautiful day.
Happy tatting!
Monday, April 25, 2016
Playing with Ninetta's Curled Rings
Oh no, the Online Tatting Class is about to cover Ninetta's alternate methods of curling rings, and I hadn't learned to make the original ones yet! So I struggled to find some empty shuttles. Where are the dozens of shuttles I've bought over the years? I certainly don't have enough tied up in UFOs to account for all of them. I think there may be something to Madtatter80's talk of tatting pixies. They snatch shuttles, too. (See the comments under Fox's post here.)
I found some empty Aero bobbins, so I 'borrowed' the shuttle from my 2014 Renulek Doily (the WIP Wednesday project). I had recently emptied a shuttle after the last snowflake, so I was ready to begin. I read the class material for the upcoming lesson and started Ninetta's Little Pendant with Curled Rings. Only one of my three efforts was consigned to the trash. However, I'm not sure I can boast much since it was my third effort. Aren't we supposed to get better with practice? The one on the right was my first effort. The one of the left was second. Sensing it must be time for a tatting break, I decided to blog about my efforts and play again some other time.
Motifs #16 and #17 for 25 Motif Challenge
Both: Variegated Manuela Size 20 (shades of blue and green with a little white and pink--# unknown)
Left: Lizbeth Size 20 Color #628 Medium Salmon
Right: Cecelia Size 20 Color #818 Baby Pink
Beads - soft pink
I had fun. In fact, it occurred to me that it would be cute to attach three of these side by side for a larger necklace pendant. I'd like to give that a try when I play with it again.
Sunday, April 24, 2016
Renulek Spring 2016 WIOSNA Update and Practicing Techniques
It is coming together nicely so far, I think. When I joined to the wrong picot of with the variegated purple, I decided it was time to take a break. I cut out part of work and untatted until I was at a good spot to start fresh next time.
Renulek Spring 2016 WIOSNA Doily (in progress)
All threads are size 80
DMC #743 (Yellow - MED)
DMC #3052 (Green Gray - MED), Lizbeth #601 (White)
DMC #52 (Variegated Violet)
My goal as I tat these days is to take the time to try new techniques or to practice techniques I have not yet mastered. I practiced Jane Eborall's Joining with no blips! on the first three joins in the green round. Then I lost my concentration and joined normally. The blipless join does not produce quite as smooth a join as my traditional method and the blip was so hard to see in these colors and this size thread that I decided to give it up for this project as long as I'm joining the purples to the green.
Another opportunity for practice came with the latest round. I've chosen to work with ball and shuttle. When I reached the first place for a second shuttle chain, I tried Lene Bjorn's technique for changing shuttle positions as described in 24 Snowflakes in Tatting for her block tatting. I did an unflipped first half followed by a normal second half and counted it as the first double stitch. The next chain was done by tatting unflipped double stitches in the same half stitch order that I usually use for the second half of a split ring. The third chain was tatted with unflipped double stitches with the half stitches reversed. It was my favorite of the three, but, unfortunately, you can't see it at the moment. I was so busy concentrating on my experiments that I joined to the wrong picot of the previous round. So that's where I shall start with my next session on this project. By the way, I found Lene's method of changing the shuttle location very convenient and, at least in size 80 thread, it looked fine. I definitely prefer her method over the Shoelace Trick.
A third practice area for me with this doily has been the job of hiding ends. After having some ends pull out when using the Magic Thread Trick in some previous projects, I had decided to go back to sewing in the ends. However, I find that this really effects the look of the rings and chains in size 80 thread. Perhaps that is because it is so hard to carefully place the thread as I work it into the double stitches, but I'm not happy with it. I sewed the ends in on the yellow center and on the white and purple round. So with the green round I decided to use the magic thread trick, but sewed a couple of stitches back the way the ends had come to lock them into place. It still isn't a perfect solution, but I like it the best of what I've tried so far for these small threads.
Saturday, April 23, 2016
Dorothy Edging Diagrams Corrected!
Many thanks to Becky for catching the mistakes in my diagrams. I had omitted a picot from the corner of each round. The link in my patterns pages will take you to the revised pattern.
Bjorn 8th of December is Finished
This was a fun snowflake to tat. I really like Lene's ball and shuttle method for block tatting. The ball thread never has to change position in your hand. She recommends an unflipped 1st half stitch followed by a normal 2nd half stitch. It was very quick. This method could be used in place of the shoelace trick for changing shuttle position in any pattern.
Motif #15 for 25 Motif Challenge
Eighth of December from 24 Snowflakes in Tatting
DMC Size 80, Color #67 (Variegated Baby Blue)
I was very conscientious in pulling the first double stitch of the chain up snugly against each clover in this final round. That turned out to be a mistake. It made the clovers want to angle so that the snowflake looked more like a pinwheel than a snowflake. It took some careful blocking of the wet flake to convince those clovers to sit at a more appropriate angle.
I'm definitely behind on the latest Renulek doily, but I hope to do some catching up today. It's been an extremely busy week, so I'm resting today with plans to do very little that isn't related to tatting. It took me a couple of hours this morning just to catch up with the reading of your blogs and the forum, but it has been a wonderfully lazy two hours.
Thursday, April 21, 2016
WIP Wednesdays
Kersti challenged some of us to join her in committing to work on our Works In Progress on Wednesdays (Craftree forum link). I usually call them Unfinished Objects (UFOs), and I have several that I really wish to complete. This seemed like a great way to ensure I'm making some progress, even if it's small. I started Renulek's Spring 2014 doily in November for my own dining room table. The links to each of the parts of this beautiful doily are nicely collected for us in Craftree. I stopped about 2/3 of the way through the next to last round to finish up the Christmas projects and just never made it back to it. I've tatted the abbreviated version of this doily many times. (Sorry, I can't find Renulek's picture of the smaller version in different colors at the moment.)
It was a difficult day to find any time to tat. I kept it where I could get to it and managed a few double stitches at a time--sometimes a whole ring! I'm sure you've had days like that, too. I managed to complete 3 more scallops in this round!
I'll try to post some of my other tatting progress tomorrow. I did get a bit done one some other projects between this post and the previous one.
Happy tatting!
Monday, April 18, 2016
Coloring the Renulek WIOSNA 2016 Doily
I'm somewhat of a coward when it comes to planning for color, but we've got some tatters in our midst who have a fantastic gift for it. They inspire me to want to be bolder in my use of color, but my bold is still rather tame by comparison. All of this leads me to share my approach to selecting colors for Renulek's latest tat-along doily. I printed several copies of the image through round 3, grabbed my colored pencils in the colors I was most interested in trying, and tested some of the different combos. My selections were also limited by the fact that I'm determined to work from my stash. I am going to need more white size 80, but that's a justifiable purchase, as you have to have plenty of white in any thread collection. Right?
I have more colors available in the size 80. That's a lavender color rather than a pink, by the way. I'm going to start with the size 80. If the final product is too small for the location I have in mind for it, I can always start again with the size 30 also featured in the picture. The only green I have in the larger size is a size 50 Altin Basak, but it tats up very similar in size to the size 30 I have.
I'm starting with a golden yellow center. It just so happens that I still have some thread of that color loaded on my shuttle. If I don't get anything else done tonight, I want to get that center tatted.
Sunday, April 17, 2016
Weekend Tatting Report
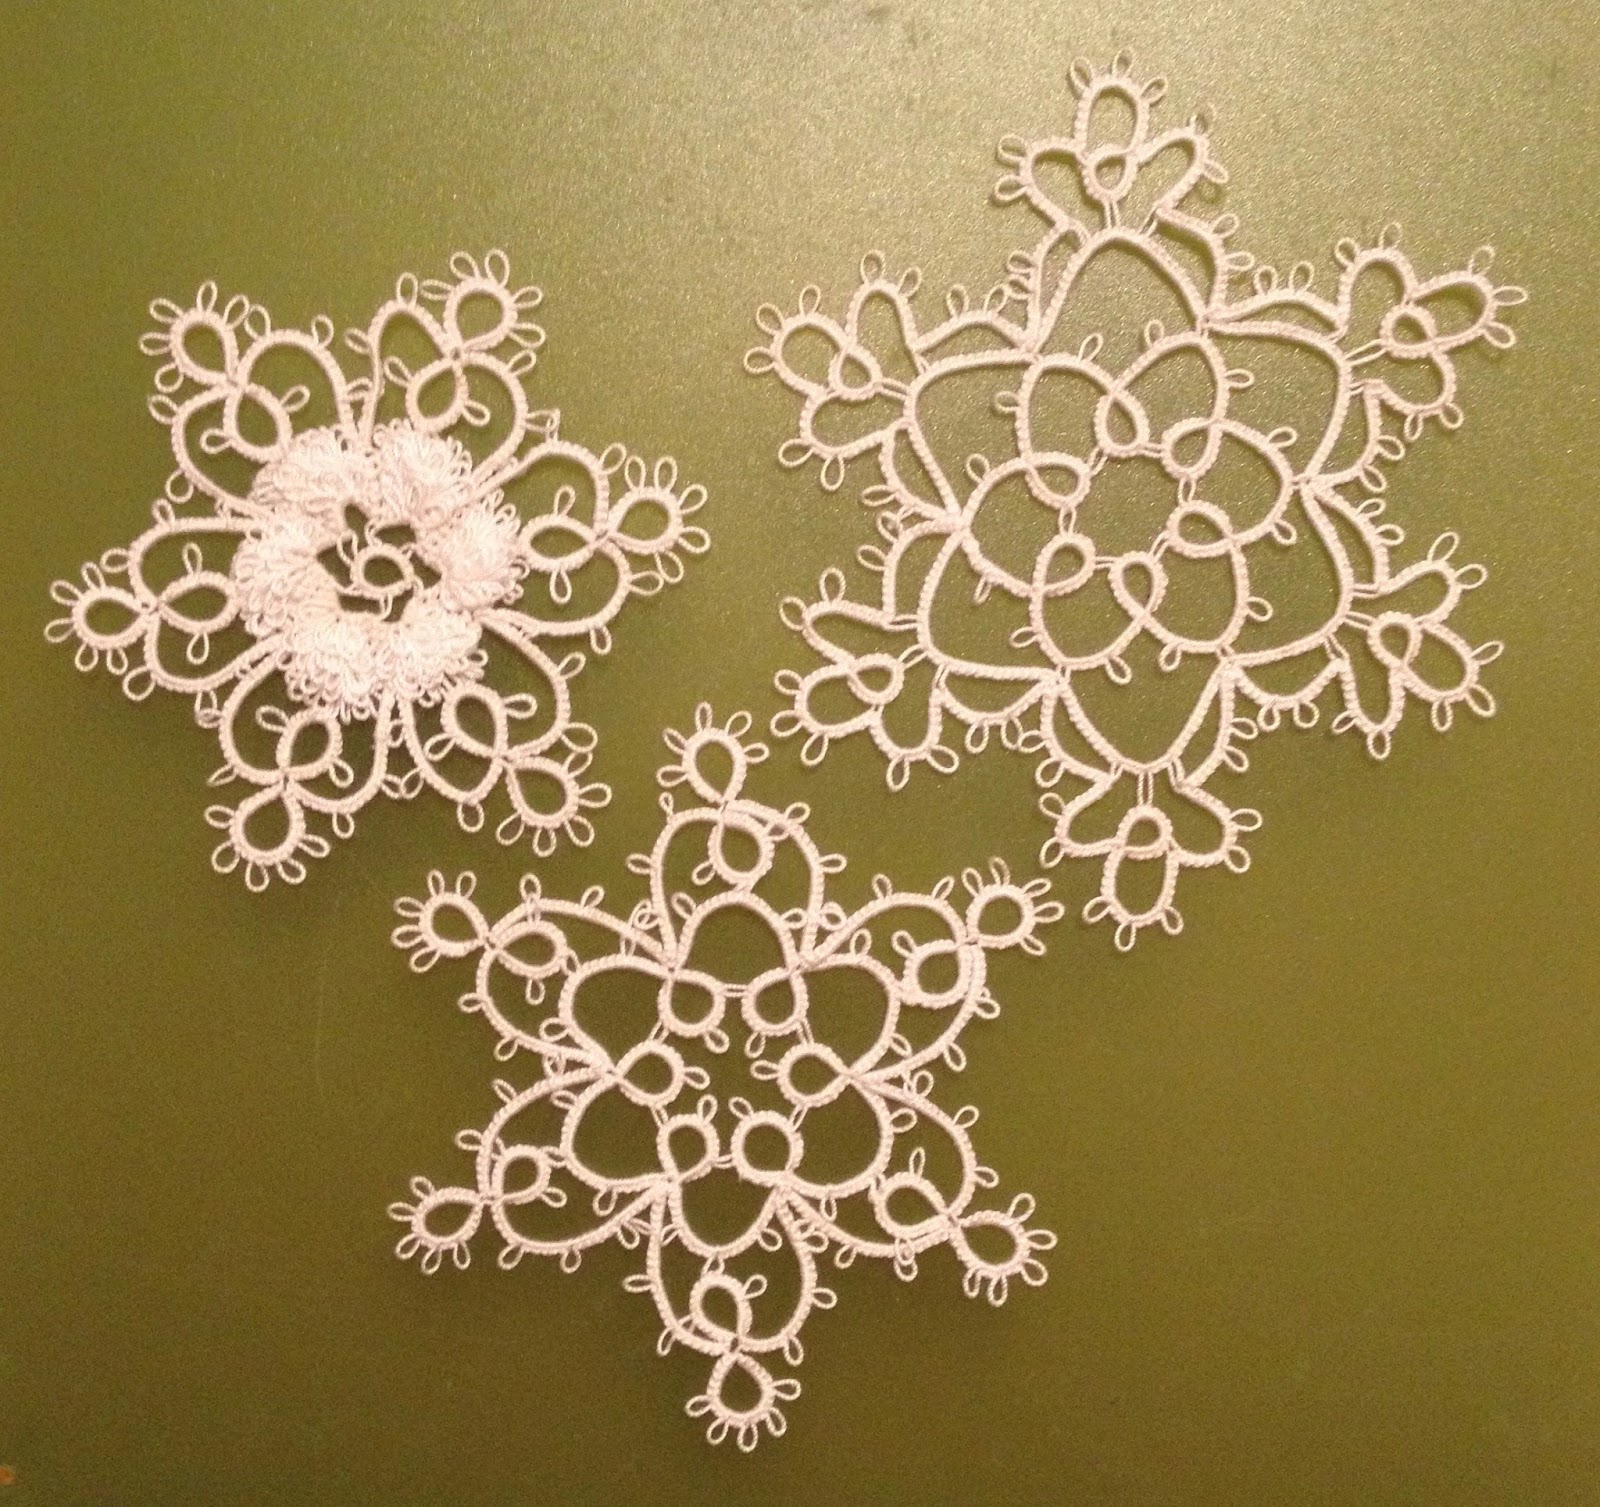
Two snowflakes and most of a third are completed for the Craftree Tat-along of 24 Snowflakes in Tatting by Lene Bjorn before the year ends. I invite you to get a copy of the book and join in the fun.
I'm using Lene's snowflakes to practice some techniques I rarely use or haven't mastered yet. My split chains are still failures. I really wish I could find David's email instructions as it worked for me every time way back when. I shall persevere.
I started with a center ring so I could climb out with a split ring of 8/8 to tat the outer round. I practiced onion rings to form those layered circles.
I'm using Lene's snowflakes to practice some techniques I rarely use or haven't mastered yet. My split chains are still failures. I really wish I could find David's email instructions as it worked for me every time way back when. I shall persevere.
The Sixth Day of December
Motif #13 for the 25 Motif Challenge
Tatted in DMC size 80, it is just over 6 cm in diameter.
The Seventh Day of December
Motif #14 for the 25 Motif Challenge
Also tatted in DMC size 80, it is 7.5 cm in diameter.
Round 1 with the beginning of Round 2
The Eighth Day of December
Also in DMC size 80.
Lene provides instructions for block tatting with ball and shuttle as well as with two shuttles. Since the Eighth recommends ball and shuttle and the Ninth recommends two shuttles, I thought I'd enjoy trying both methods of block tatting to see if I prefer one method over the other.
Thanks for dropping by my blog!
Saturday, April 16, 2016
Benporath Cake Doyley Complete and Delivered
Many thanks to all of you who answered my call for feedback about adding the center medallion to Norma's Cake Doyley. With a fair amount of trepidation, I decided to add the center medallion. It's done and delivered, and Mom was thrilled with it.
Norma suggested using the buttonhole stitch to sew around the motif, catching the outer picots as you sew. The first thing I had to do was an internet search for instructions on the buttonhole stitch. For a first effort, it came out pretty well. I was really nervous about cutting the fabric away behind the lace, but so glad I did once I saw the difference it makes. Laying the lace atop the fabric circle really didn't give me a clear idea of what it would look like once the fabric behind it was removed.
Friday, April 15, 2016
Insert or No Insert
I'm excited to report that the tatting of the Norma Benporath Mystery Cake Doyley is complete. I'm seriously torn about whether to add the motif to the center. Norma provides enough instruction in the pattern that I think I could create the cutout behind the center medallion. Two things make me reluctant to finish it as Norma intended. Firstly, Mom will not use it as a cake doily and may be reluctant to sit anything on it that might hide the center medallion. Secondly, I'm concerned that I chose such a small fabric circle that the motif is a bit too large by comparison. So I'm asking you for your input. I confess, though, that there is a part of me that wants to see it through so that it is a good reproduction of what Norma tatted for her original pattern.
Motif #12 for the 25 Motif Challenge
Thursday, April 14, 2016
Very Little Progress
In the last five days, I've managed to complete only two more scallops on the Benporath Mystery Cake Doyley. Three more to go.
Sunday, April 10, 2016
Bits and Pieces
I had fun playing with my shuttles today. It began when I decided to empty a few shuttles making little bits to share at demonstrations (mostly for the children).
I decided to try Wanda Salman's button motif idea first. I didn't realize how close my motif was to hers until I visited it again so I could add the link for you. I guess I remembered it more precisely than I thought as I was not trying to copy your pattern, Wanda. The larger heart is an attempt at Kiss Curl Heart by Nicola Bowersox, but I didn't follow the stitch count very closely. Of course, the butterfly is a very common idea.
Then I decided to practice some techniques. I had the larger clovers already tatted and practiced the single shuttle split ring to hide the ends securely.
The small clovers are a pattern by Gina Brummett, Lucky Seven Shamrock. I just hate to tat the dimpled ring that uses a picot. Gina's pattern uses Josephine sets. I like this method so much better. So I made two of them and used SSSRs to hide the ends. Then I made a couple of hearts by making only one 'leaf' of the clover. You see only one of them because I immediately lost one of them., two of them, but somehow I lost one of them immediately after tatting it.
The last little item was an attempt at Abbytatsalot's caterpillar, but I ran out of thread at the 3rd ring. I was especially interested in it because of its frayed picots. Even as a little 3-ring creature, it's pretty cute, I think.
Happy tatting!
Saturday, April 9, 2016
Tatting at the Library
I had a wonderful time today demonstrating tatting at the Laman Library in North Little Rock, Arkansas. I spent 2 hours there at a table in front of the main desk. The picture below is part of my display. I wasn't very well prepared since I had not planned to do a public demonstration today. However, the opportunity was there, so I did it.
My display included some works in progress and some designs in progress, as well as completed pieces I had with me. I arranged everything in groups according to size thread.
I think the children who came over to watch were more fascinated than the adults. Some people had no idea what I was doing. Others told me stories about friends or family members who tatted. One woman thought it was crochet at first. While she had no desire to learn, I enjoyed visiting with her and her husband. I enjoyed visiting with them all!
As I was packing up to leave, the librarian asked me if I would be willing to teach some classes at the library. Of course I said yes. I left my contact information at the front desk for her. I don't know what we will be able to work out in the way of a schedule since I don't live or work in North Little Rock, but I'm excited about sharing our hobby with others and possibly adding to our tatting community.
I'm also determined I shall never again be caught unprepared to do a public demonstration. I'm going to put a few things together to leave in my car. My list includes: small tatted items to give away; a few shuttles loaded with thread for the eager to try (I think I'll make some more business card shuttles); a Tatting Demonstration sign so people won't hesitate to approach; and some business cards with my blog address. Can you think of anything else I need to include?
Friday, April 8, 2016
A Bluebird for fun
Wanting to tat, but feeling too tired to attempt further progress on the doily, I decided to empty one of the business card shuttles working the Tatted Bluebird by Nancy Tracy. I accidentally omitted 2 ds and a picot in one of the rings and I adapted the pattern to practice an inward-facing picot for the beaded eye, but it is a darling pattern--lots of fun to tat! I used the Reverse Join to change the place of the shuttles for the chains that form the head. It's a handy technique. Considering the number of mistakes I made in this little motif with size 10 Manuela thread, I'm glad I didn't try to work with the size 80 tonight.
Motif #11 for the 25 Motif Challenge
Thursday, April 7, 2016
Just 5.5 repeats left!
I found myself with more time to tat today than usual, so I made good progress on the doily. I have just 5.5 repeats left. It's finished diameter is about 9.5 inches. I'm very close to the end of this ball of thread. I have another, but I didn't expect to need it. I really like this bright, sunshiny yellow. It is so cheerful.
I had actually planned to do this outer round in white, but I reloaded my shuttle and started the round without thinking. Now I'm glad I forgot the plan.
I don't expect to have much time, if any, to tat tomorrow, so it will be the weekend before I finally finish this round. I still have a center motif to tat. Once it's tatted, I'll decide whether or not to attach it. It looks rather lovely without it. I will post a picture of it with and without the center and you can tell me what you think.
If you remember, I originally started this project by tatting the center motif first using Finca size 16 perle cotton. I've got an idea for finishing it into a larger motif that keeps with the theme of the doily. If I don't use the DMC center on the doily (and I like the enlarged perle cotton motif), I may complete the DMC center the same way. Thinking and planning is half the fun.
I had actually planned to do this outer round in white, but I reloaded my shuttle and started the round without thinking. Now I'm glad I forgot the plan.
I don't expect to have much time, if any, to tat tomorrow, so it will be the weekend before I finally finish this round. I still have a center motif to tat. Once it's tatted, I'll decide whether or not to attach it. It looks rather lovely without it. I will post a picture of it with and without the center and you can tell me what you think.
If you remember, I originally started this project by tatting the center motif first using Finca size 16 perle cotton. I've got an idea for finishing it into a larger motif that keeps with the theme of the doily. If I don't use the DMC center on the doily (and I like the enlarged perle cotton motif), I may complete the DMC center the same way. Thinking and planning is half the fun.
Tuesday, April 5, 2016
Started the Final Round
I finished round 2 and began the final round on the Benporath Mystery Cake Doyley. I encourage you to visit Craftree to see this project. When you are working from a pattern without a good picture, it is sometimes hard to know what is a mistake in the pattern and what is intentional.
Norma didn't write reverse works into her instructions. If you make the unattached rings on round 2 as second shuttle rings, the chains will arch rather than form the sharper point of my chains. I made the round with one shuttle and a ball thread so that the unattached rings want to face the same way as the other rings. I then folded the rings outward to form that sharp angle to the chains.
Both the first Benporath Mystery project we did and this one contain instructions to join into one picot immediately followed by instructions to join into another picot. If you assume it to be a mistake, you must add what you believe to be the missing stitches between the joins. If you assume it is intentional, you must decide how to make the joins. This was what first motivated my explorations into joins to 2 picots. I chose to believe it to be intentional, and I'm using the down picot joins (the last in my practice sample). It is in this last round where the single ring joins to the two middle picots of the 4-picot chain segment (between the scallops).
This pattern also has a motif for the center of the fabric. The fabric would normally be cutout behind the motif. I will tat it again in this thread, but I haven't decided whether I will sew it to the doily. I know I won't cut the fabric out behind it.
The thread I'm using is DMC size 80, color 743. I'm really enjoying tatting this edging.
Norma didn't write reverse works into her instructions. If you make the unattached rings on round 2 as second shuttle rings, the chains will arch rather than form the sharper point of my chains. I made the round with one shuttle and a ball thread so that the unattached rings want to face the same way as the other rings. I then folded the rings outward to form that sharp angle to the chains.
Both the first Benporath Mystery project we did and this one contain instructions to join into one picot immediately followed by instructions to join into another picot. If you assume it to be a mistake, you must add what you believe to be the missing stitches between the joins. If you assume it is intentional, you must decide how to make the joins. This was what first motivated my explorations into joins to 2 picots. I chose to believe it to be intentional, and I'm using the down picot joins (the last in my practice sample). It is in this last round where the single ring joins to the two middle picots of the 4-picot chain segment (between the scallops).
This pattern also has a motif for the center of the fabric. The fabric would normally be cutout behind the motif. I will tat it again in this thread, but I haven't decided whether I will sew it to the doily. I know I won't cut the fabric out behind it.
The thread I'm using is DMC size 80, color 743. I'm really enjoying tatting this edging.
Sunday, April 3, 2016
Weekend Tatting
I made some progress on the Norma Benporath Mystery Cake Doyley. I attached the first round to the fabric before starting round 2. The fabric gets quite wrinkled as I work, but it will all be pressed nicely later.
I also had the opportunity today to test a tutorial by Tamara for creating tatting shuttles from business cards or cardboard of similar weight. She has posted the tutorial, but please note that she is still editing it. Tamara has limited access to tatting supplies in the Dominican Republic, so she developed this idea to meet the need for some shuttles for a workshop she plans to teach. These use supplies she had readily available at home. I used the same materials and I am very impressed with her shuttles. I made one of each of the two designs and tatted a centipede with each shuttle using size 10 Manuela threads. which is the thread size I usually use when teaching. The pattern is by Lisbeth Johansson and I found it in 2003 at http://www.frivolitesknuten.com but that link is no longer working.
These little centipedes are #9 and #10 for the 25 Motif Challenge, too.
Friday, April 1, 2016
Happy International Tatting Day!
I hope all of you tatters have a wonderful day today that includes time to tat! If you don't know how to tat yet, many of us will be tatting in public today to share our art. We love adding new tatters to our community. If you want to learn to tat, just ask us.
My International Tat Day gift to you this year is the pattern for the Dorothy Edging that I designed for a handkerchief for my mother this past Christmas. Some of you asked for the pattern, so I've been busy trying to refresh my limited diagramming skills to get it ready for you. I still have a bit to learn about using my graphics program, but this was the best I could do. I hope you enjoy using it. Just click on the image and you'll be taken to the pdf of the pattern. It will be added to my patterns page soon.
Wednesday, March 30, 2016
Joining to 2 picots at one location
The Dorothy Edging that I designed for my mother for Christmas requires you to join to a picot from two chains at one location. As a result of some confusion about how Norma Benporath intended for us to make a similar join in a round that was part of the Norma Benporath Mystery Border, I started to explore different ways this might be done. I settled on making those joins by joining to each picot separately without completing a half stitch between rather than joining by pulling the thread up through both picots at the same time. It produced a different look. Since then I've tried up joins and down joins in various combinations as well. Click HERE to see the results of my explorations. This was not an attempt to explore all of the ways this could be done, but to explore the effects of some of the different ways of which I am currently aware.

I plan to celebrate International Tatting Day (April 1) by sharing another free pattern with you. I hope you'll drop by to see it.
Monday, March 28, 2016
Motif 8 for 25 Motif Challenge
It always feels good to finish a project, and especially so this time as it was such a challenge. I attempted to use some tips from Nina Libin's Beanile tatting to create the jewels for the top center of the crown. It isn't perfect, but I'm very happy with my first effort at this type of use of beads in tatting. I used Gale Marshall's pattern for the Queen Mom Memorial Crown and substituted lots of different beads and made the changes necessary to make them work. So that's motif #8 for the 25 Motif Challenge.
Lastly, I had to revisit the eyes of my brown-eyed sock doll. I brought her eyes closer together, and I think she looks better.
Saturday, March 26, 2016
Tatting on Sock Dolls
Butter Bean is about to turn one so I've been busy creating something special for her birthday. Her mother was about the same age when I made her some sock dolls. I didn't tat then, so they didn't look as fancy as these two. I like the eye placement on the blue-eyed one better than the brown-eyed one now that I look at them together. I didn't compare the two as I worked, instead creating one and then the other. It has been an all-day project.
I needed an edging for the neck that would curve in a very tight circle. I was inspired by the current round I'm working for the Norma Benporath Mystery Cake Doyley. Rings have the same count and picot placement as that round, but the arrangement of the rings is different. I shall count these as Motif 7 for the 25 Motif Challenge.
The thread on the blue-eyed doll is Lizbeth Juicy Watermelon in size 20. The thread on the brown-eyed doll is an HDT by Jess Foster aka Tat-ilicious. I love all of the threads I received from Jess.
Thursday, March 24, 2016
Almost done!
With the crown, that is. It is really coming together nicely. Just one more section to go.
And I managed to get a few more inches done on round 1 of the Benporath Mystery Cake Doyley.
Wednesday, March 23, 2016
More Time Than Usual to Tat
A drive to Memphis with my daughter for a day at the Memphis Zoo yesterday meant that I had more tatting time than usual. I worked on the Norma Benporath Mystery Cake Doyley during the drive, then loaded beads and tatted another section on the modified Gale Marshall Queen Mom Memorial Crown when I got home. The zoo was wonderful in spite of the wind. It was a fantastic day.
Tuesday, March 22, 2016
Progress on the Crown
I made some progress last night, completing the next section. I'm having some problems getting it to curve as I wish, but I'll just have to see how it does after I add the center piece. I haven't attempted to block anything yet.
The teardrop-shaped beads in this upper section are actually a very soft pink, though they look rather brown in this photo with the black background. This is an adaptation of Gale Marshall's Queen Mom Memorial Crown.
Monday, March 21, 2016
More Lene Bjorn Snowflakes and WIP progress
December 1 and 2 are done. I need to do a better job of blocking, but I plan to wash all of them before the final blocking. Join the Craftree challenge to tat all 24 snowflakes in 2016. I'm considering these to be motif #5 and #6 for the 25 Motif Challenge.
I'm starting over on the Norma Benporath Mystery Cake Doyley. While I love Finca size 16 perle cotton and it was looking wonderful, it was proving too fragile for me for this project. I'm beginning again with DMC size 80 in the closest color I have on hand.
Now I'm off to work on the crown this evening.
Happy tatting!
Sunday, March 20, 2016
The fairy tale tatting was finally framed
I'm not quite ready to post images updating my works in progress, but I remembered that I hadn't shared an image of the tatting I did for my granddaughter's bedroom. We finally got it framed and hanging on the wall. Thumberlina (that's how it is spelled in the book) and the Princess and the Pea are from 12 Tatted Fairy Tales by Inga Madsen. Pegasus and the Unicorn are in Flights of Fantasy by Martha Ess.
I hope to have pictures of the WIPs in a day or two.
Saturday, March 19, 2016
Element-al Approach Update & Links Corrected
I'll post some updates on some of my tatting later this weekend, but I wanted to get these corrections up right away. Many thanks to Don who emailed me for permission to view the documents. Had he not alerted me to his difficulty in accessing them, I would not have discovered I had shared the wrong links. I went ahead and updated the documents while I was at it, so the links on my Techniques page should take you right to them.
Monday, March 14, 2016
Crown Progress & Element-al documents updated
The only image I have available to show you today is one of a work in progress. It's Gale Marshall's Queen Mom Memorial Crown. I wanted to do quite a bit of bead substitution, so I decided to tat the crown in parts. It made figuring out the bead placement on shuttle and ball threads a little simpler. This is all I've completed so far on the lower part of the crown. I'm using DMC Cecelia size 30. I had a special request for this crown and I've got 2 weeks to finish it. It isn't the kind of thing I can work on with the baby around, so I'll be working on other projects at the same time.
I finished the tatting of the December 1snowflake (see previous post), but it isn't ready for a photograph.
I've updated the links to the 2 Element-al documents. Be sure to email me or post here at the blog if you have any recommendations for additions or changes to these. You'll find the links on the Techniques page of this blog.
I finished the tatting of the December 1snowflake (see previous post), but it isn't ready for a photograph.
I've updated the links to the 2 Element-al documents. Be sure to email me or post here at the blog if you have any recommendations for additions or changes to these. You'll find the links on the Techniques page of this blog.
Friday, March 11, 2016
This one doesn't count
I sometimes have to remind myself of the great piece of wisdom I heard a number of times on the old Lace@Arachne.com mailing list. (I know, I'm dating myself as some of you won't have a clue what that was.) "Small imperfections are proof the item is handmade."
That worked for me with this lovely snowflake (December 1 in Lene Bjorn's 24 Snowflakes in Tatting) when I realized I had added an extra picot to one of the large outer rings. So I pressed it and got it all ready to photograph. I've admired it several times since I finished it late last night. It's a beautiful design. So I'm handling it again, trying to decide whether to post it today or wait until I finish December 2 when I spotted it. Oh, no! I skipped one of the small rings that leans against those large outer rings. Now that's just too much. It's a good thing I really enjoyed tatting this one, because I really must do it over.
So today's snowflake doesn't count toward any of the challenges. It's a sample of what happens to all of us now and then. Proof to my future tatting students that I really do make my share of mistakes. ;)
Thursday, March 10, 2016
4 motifs to start the 25 Motif Challenge
I seem to be in the mood for challenges lately. I've been battling severe asthma for over a month and now have bronchitis. Sitting and tatting is one of the few things I really feel like doing. It is restful and productive at the same time--a wonderful combination.
Sharon's 25 Motif Challenge is one of my favorite blogs to follow. It helps me find the blogs and webpages of other tatters. Of course, I want to follow all of you! It has been years since I participated in the challenge myself, but this seemed like a great year to jump back in.
My first 3 motifs for the 25 Motif Challenge are also my first 3 motifs in the Craftree challenge to tat all of the snowflakes in Lene Bjorn's 24 Snowflakes in Tatting this year. I'm using white DMC Cecelia size 30. These are December 3, 4, and 5. Since the challenge started at the first of the year, most of the participants are working on December 5 or December 6. I decided to start with the #5 snowflake as that is the one I'd have been working on in the first half of March if I was on target. Then I started working backward to catch up as I have time. I'll get December 1 and 2 done as I get time, but I'll keep moving forward through the rest of the book on schedule. At least, that's the plan.
Lastly, I want to share another Ice Cream Cone as an example of working a mistake into the design. When I went to join the third ring of the outer round to the center square, I joined to the wrong picot. Rather than take out that ring, I just increased the number of rings and chains and made sure the 2nd side mirrored the first. Most likely only another tatter would notice that it differs from the original design. The pink thread is a Manuela size 20 I had on hand and the cone is more of the Altin Basak size 50.
Tuesday, March 8, 2016
5 Tatted Ice Cream Cones
This is a pattern that I enjoy tatting. I load the ice cream thread with 14 to 16 beads for the square, placing 8 of those on the shuttle. I load 16 to 20 for the outer round with 8 of those again on the shuttle. I then place them randomly as I tat. I used size 20 thread for the ice cream--DMC Cecelia white and brown, Manuela pink. The cones were tatted with some Altin Basak size 50 that I had on hand. In spite of the size 50 on the label, I find this thread to be somewhere between DMC Cecelia size 20 and 30 in size.
Sunday, March 6, 2016
Oops! Can't salvage this one.

When I use the Magic Thread trick to hide ends, I usually wait until I've joined at least one more round before I snip the ends. This time I slipped into production mode to make several Valeire Square Ice Cream Cones and didn't give it a thought as I did the finishing of all of the first rounds before starting the second ones. You guessed it. On number 5, the ends came loose as I was working round 2. My nimble-fingered daughter tried to salvage it by making a knot with those tiny ends, but instead we managed to pull another double stitch off. Maybe this will help me remember in future to wait until the project is finished, or at least until another round or two has been added, before I snip those ends.
Thursday, March 3, 2016
Dorothy Edging - more Christmas 2015 projects
While I'm working on the Benporath mystery project, I'll share some more of my Christmas 2015 tatting.
I have lots of patterns and patterns in books, but sometimes you get an idea in your head and just can't find anything that fits just right. That's the story behind this edging. I wanted something dainty and open, sort of a stained glass window look. So I finally picked up shuttle and thread and started tatting. It fell into place perfectly. The thread is size 30 Cecelia.
Attaching my tatting to anything with needle and thread is a real challenge for me and causes hours, in this case days, of pain afterward, so please don't judge my sewing too harshly. I'm just thankful I managed to get it attached at all.
I call the pattern Dorothy in honor of my mother for whom I designed it. I'll try to work up a pdf of the pattern for you in the months to come, but I'm committed at the moment to another project for my granddaughter with only a few weeks to get it finished. Meanwhile, enjoy the pic.
I have lots of patterns and patterns in books, but sometimes you get an idea in your head and just can't find anything that fits just right. That's the story behind this edging. I wanted something dainty and open, sort of a stained glass window look. So I finally picked up shuttle and thread and started tatting. It fell into place perfectly. The thread is size 30 Cecelia.
Attaching my tatting to anything with needle and thread is a real challenge for me and causes hours, in this case days, of pain afterward, so please don't judge my sewing too harshly. I'm just thankful I managed to get it attached at all.
I call the pattern Dorothy in honor of my mother for whom I designed it. I'll try to work up a pdf of the pattern for you in the months to come, but I'm committed at the moment to another project for my granddaughter with only a few weeks to get it finished. Meanwhile, enjoy the pic.
Wednesday, March 2, 2016
Mystery Tat Along - Norma Benporath Round Doily
I've got to purchase some beads before I can start the project with the next deadline, so I'm reluctant to return to my big project for myself. I just can't get excited about starting it just to put it back down again for a more urgent project.
Looking for something to occupy me in the meantime, I stumbled across the second Benporath Mystery Tat Along in Craftree and decided to jump right in. The pattern is at http://www.craftree.com/patterns/5557
I finished the medallion that goes in the center of the fabric circle. Now to start the edging that is supposed to mount to the outside of a fabric circle. I'm working with Finca size 16 perle cotton. It has been ages since I've worked a project with it. It didn't take many double stitches to remind me why it's one of my favorite threads. (And, yes, that's a dab of Fray Check on the join. I was feeling lazy and tatting for myself. I confess I find it a wonderfully useful shortcut now and then.)
Looking for something to occupy me in the meantime, I stumbled across the second Benporath Mystery Tat Along in Craftree and decided to jump right in. The pattern is at http://www.craftree.com/patterns/5557
I finished the medallion that goes in the center of the fabric circle. Now to start the edging that is supposed to mount to the outside of a fabric circle. I'm working with Finca size 16 perle cotton. It has been ages since I've worked a project with it. It didn't take many double stitches to remind me why it's one of my favorite threads. (And, yes, that's a dab of Fray Check on the join. I was feeling lazy and tatting for myself. I confess I find it a wonderfully useful shortcut now and then.)
Tuesday, March 1, 2016
Additions & Updates to MyPatterns and More December 2015 tatted presents;
I've updated the links and added a few patterns to My Patterns. The newly posted ones are patterns I've shared in the past, many of them ages ago. Be warned! I have not updated the instructions. They reflect what I knew how to tat and what I knew about sharing my patterns at the time.
Here is a picture of some red ornaments I made for my niece using size 30 Cecelia thread. I apologize this isn't the best picture of the tatting, but as usual I was scrambling to get everything pressed, stiffened, and wrapped up at the last minute.
All three patterns are by Pam Palmer.
*Santa's Sleigh is on page 8 of Tatting Treats (1994).
*Rocking Horse is on page 4 of Tatting Treats Two (1997).
*Teddy Bear is on page 10 of Tatting Treats Two (1997).
Sunday, February 28, 2016
Element-al Approach to Designing
I've finally made some progress on a project I've wanted to do for ages. It's a resource for those of us who want to design tatting. If you think about it, tatting is made up of ring shapes (usually a ring), curves (usually chains), and straight lines (traditionally the bare thread). So with those basic elements in mind, what can we substitute or modify to get a new look? Georgia Seitz is going to share my handouts in the online classes tomorrow. I invite you to visit the links she has provided at http://www.georgiaseitz.com/2016/2016index.html and even attend one of the class sessions if you can. I value your input, so email me or post here if you think of something that should be added. It is a resource I want to make freely available to all, possibly even in a format that you can modify to reflect your personal preferences. One handout contains ideas for modification or substitution. The other includes links to techniques and patterns for practice or example. In some cases, there are lots of sources for the technique, and my document can't reasonably include them all. For that reason, I'm thinking it might be good to make it customizable. I'm still thinking. Remember it's a work in progress.
An Element-al Approach to Tatting Design*
*Please note that I've changed this link to take you to my Techniques page. I will keep the links on that page of my blog connected to the latest version of these handouts. The pdfs will eventually be replaced with Word documents that you can customize for your own use.December 2015 Tatted Presents
Wow! Where does the time go? The older I get the faster it seems to move.
I hope you'll think better late than never as I update you with what I've been working on in the months since my last post.
*I designed the two button bookmarks, but they are a simple combination of rings and chains.
*This cross by Jackie Fiuntini of New South Wales is a favorite go-to piece for me. It was published on page 3 of Tatter Tales, Volume 3, Issue 3.
*The little fairy with the wings is adapted from a combination of the features I liked best in Teri Dusenbury's Pincess Bijou Fairy and her Princess Dorie Fairy. Both original patterns were printed in her Tattle Tales newsletters. Princess Dorie is available online along with a few of her other Papillon Princesses at http://teridusenburystattletales.blogspot.com/2014/09/tatting-bookmarks-papillon-princess.html, but I don't see Bijou among them.
*The Bird of Paradise Bookmark is from page 29 of Dianna Stevens' Animal Bookmarks, A Tatted Zoo (2004).
*The hanky edging is Eternity Rings by Mary Konior. You'll find it on page 26 or Tatting with Visual Patterns (1992).
I designed an edging for another hanky when I couldn't find a pattern that seemed just right. You'll see it a bit later along with a picture of the fairy tale tatting finally up for display in my granddaughter's bedroom. It took us forever to find the ivory velvet I wanted for the backing.
Happy tatting!
I hope you'll think better late than never as I update you with what I've been working on in the months since my last post.
*I designed the two button bookmarks, but they are a simple combination of rings and chains.
*This cross by Jackie Fiuntini of New South Wales is a favorite go-to piece for me. It was published on page 3 of Tatter Tales, Volume 3, Issue 3.
*The little fairy with the wings is adapted from a combination of the features I liked best in Teri Dusenbury's Pincess Bijou Fairy and her Princess Dorie Fairy. Both original patterns were printed in her Tattle Tales newsletters. Princess Dorie is available online along with a few of her other Papillon Princesses at http://teridusenburystattletales.blogspot.com/2014/09/tatting-bookmarks-papillon-princess.html, but I don't see Bijou among them.
*The Bird of Paradise Bookmark is from page 29 of Dianna Stevens' Animal Bookmarks, A Tatted Zoo (2004).
*The hanky edging is Eternity Rings by Mary Konior. You'll find it on page 26 or Tatting with Visual Patterns (1992).
I designed an edging for another hanky when I couldn't find a pattern that seemed just right. You'll see it a bit later along with a picture of the fairy tale tatting finally up for display in my granddaughter's bedroom. It took us forever to find the ivory velvet I wanted for the backing.
Happy tatting!
Subscribe to:
Posts (Atom)