Wednesday, June 29, 2016

Concentric Rectangles Finished

One project checked off my WIP list as the Concentric Rectangles doily is finished.
Concentric Rectangles by Edda Guastalla Bianchetti
with modified corners in final round
26 cm by 18.5 cm (10.25 inches by 7.25 inches)
Size 20 thread: Flora 204 (yellow), Lizbeth 105 (variegated), Lizbeth 663 (blue)
Motif #2 for 2nd 25 Motif Challenge for 2016

I reversed work between rings and chains as in traditional tatting. but I used up-joins when joining the rounds together that join ring to ring and down-joins when joining the rounds together that join chain to chain. This kept all of the color blips on the same side. I also modified the corners of round 5 by adding an extra clover and chain, producing a point in each corner.

The angle of the picture makes the sides look slightly distorted, but they are nice and straight producing a pleasing rectangle.


Monday, June 27, 2016

Round 4 of the Test Tat is complete

Hi, everyone. I managed to tat round 4 of the test tat for Jessica of the Sander's Tea Cloth. It is currently 19.5 cm, or 7.75 inches, in diameter in size 40 DMC Cordonnet. I'm a little concerned about whether there is enough room to properly insert the next round of motifs between those of this round, but I'll give it a try.


The final round of the Concentric Rectangles doily is underway, but I made a change to the corners  so I'm going to keep you in suspense until I can post a picture of the whole.

I continue to purposely lag behind on the Renulek doily. My start of round 10 with purple rings and white chains really doesn't appeal to me so I plan to cut it off and begin again.

Thank you to all of you tatting blog writers. While my tatting has been limited to easy projects that can be picked up and put down often, I've been popping in to see what the rest of you are doing. It's inspiring to follow your progress.

Happy tatting!

Monday, June 20, 2016

A little tatting and a little blog reading

As you can see, I managed to add a round to Renulek's Spring doily, but I'm still way behind. I'm content with that, though, because it gives me room to better plan the colors.

I'm struggling to keep up with blog reading as I love seeing what the rest of you are doing, but it's a busy time of year here at home. I'm getting a little bit done now and then on the Concentric Rectangles Doily and the test tat for Jennifer by carting them around everywhere I go, but I'm just not getting much computer time. Keep the tatting and blogging going. Things will slow a bit starting next week, I think. Meanwhile, I'm enjoying time with my family.

Happy Tatting!

Wednesday, June 15, 2016

WIP Wednesday

While I haven't accomplished much tatting in the past week, I managed to be close to finishing a round in each of three of my projects. I made it my goal today to complete those unfinished rounds.
The Renulek tat-along doily is just over 20 cm in diameter at the end of round 8. I'm still behind by a few rounds, but I'm not going to worry about that. (Size 80)

The image on the top right is the tea cloth test tat I'm doing for Jessica. At this point I've completed round 3. The next round is several motifs with two rounds each. It is approximately 12 cm in diameter so far. (Size 40)

The bottom image is the Concentric Rectangles doily. Just two more rounds to go, although Edda says you can keep going to make it as big as you like. It is 15 cm by 22.5 cm thus far. (Size 20)

Wednesday, June 8, 2016

Test Tatting

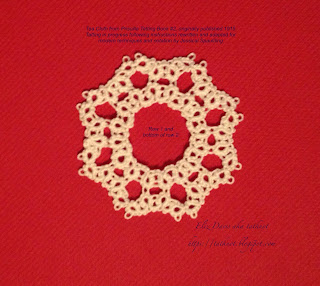
While I haven't tatted since the weekend, I do have a little bit of tatting I can share with you. I started test tatting the adaptation of a 1915 tea cloth pattern which has been done by Jessica Spaulding. You may have seen her beautifully colorful tatting of the center of this large piece at her blog. When I was much younger, the idea of doing a large piece of tatting did not interest me at all. I find, however, that the idea now intrigues me. I like the idea of making something a bit spectacular. I'm not yet up to a tatted bedspread (I've seen and touched a gorgeous one!), but this I think I can do. I chose size 40 DMC Cordonnet in white. It looks ecru in this photo, but it really is a nice white. At the completion of the bottom of row 2, the piece measures 4.5 cm.
Life has been full of grandchildren, baseball (5 games this week), and other child-related activities. We even made a trip to the zoo today. Butterbean is cutting 4 new teeth at once which has been trying at times for both of us. I've also got some sewing started. Tatting is low on my priority list for this week. At least one of the doilies I have in progress is always with me just in case, but the practice of new techniques like filet tatting and Ikuta overlapping picots in a ring will definitely have to wait.  I love learning new things, so I can't bear to put either of those off much longer. Hopefully, I shall get to them next week. That's the plan anyway.

Don't be surprised if you don't see another post from me before the weekend, but I'll try to pop in to read your blogs now and then.

Happy tatting!

NOTE: If you want to see a scan of the original pattern showing what the final full-size doily looks like, Jessica has it here. I'm not sure how far I will go or what changes I may make as it gets larger, but I really like the center.
SaveSave

Saturday, June 4, 2016

Finished Row 7 of Spring 2016 Renulek Tat-along Doily

Row 7 of Renulek's tat-along doily is now complete all in green. If you want to join the fun, the pattern starts here in her blog.
19 cm in diameter in DMC size 80

I think some of you will appreciate the use to which I put that failed effort at making a supersize Spinning Wheel Mat. After cutting the glass beads out, I gave it to Butterbean. She looks like she is pretending to tat it with her Tatsy shuttle, but who knows. She doesn't have enough language skill yet to tell me. :) Please forgive the slightly blurred photo. She was very busy.

Thursday, June 2, 2016

Ikuta Layered Picots

I opted to work on muskaan's Ikuta tutorial part 2 last night instead of my WIP after figuring out just what I need to do next on the WIP. I've been wanting to get to this ever since she put it up. As I commented at her blog, her tutorials are really helping me to have a solid feel for where my threads are and need to be all the time. I truly think I just got lucky when I worked through the class material the first time on my own because my tatting looked right, but I really didn't fully understand why or why not, if you know what I mean.
The first ring was made with the shuttle thread picots to the front. I thought that one would be the easiest one as it seemed obvious to keep the shuttle threads to the front. I found it hard to keep both threads on my left hand, so I resorted to dropping the ring thread off my hand each time.

My second effort (bottom left) was an attempt to keep the ball thread picots to the front. While you can't tell from the picture, I let my threads get messed up so that some stitches wound up upside down which also messed up the alignment of the picots making it appear one was missing. It took some major pushing and pulling to get everything back in place since I didn't notice it until I had closed the ring. To make sure that was just a fluke, I tatted it again (bottom right). As you can see my work is getting better looking with the 3rd ring. I have to say that, for me, tatting with the ball thread picots to the front was the easiest. I started out trying to keep both threads on my left hand with the ball threads to the front, but it just wasn't working out. I started tossing the ball thread over the back of my right hand to keep it out of the way when not in use. When I needed to tat with the ball thread, it worked best for me to open the ring loop large enough that it could slide back on my left hand a bit, thereby making room for the ball thread to take its place temporarily in front.

Tatting of Ninetta's butterfly has been delayed until I can work with the next installment of muskaan's tutorial which I'm sure will cover overlapping picots in a ring.

Happy tatting!

Wednesday, June 1, 2016

Latest WIP Wednesday Project

Kersti's Craftree WIP Wednesday challenge is great incentive to pull out some UFOs (unfinished objects). Just committing to working on the last one every Wednesday kept it in my mind so that it got picked up more often than that.

The piece I've chosen as my next WIP Wednesday project is a handkerchief edging that I started back in the middle of 2011. Diane the Lace-Lovin' Librarian gave me this beautiful handkerchief. I started Mary Konior's Beaded Braid, Tatting with Visual Patterns, page 9. Tatting went into hibernation for a good while and, by the time I was puttering at it at least, I had misplaced the project. I found it again just a few weeks ago.