Projects and explorations in the world of lacemaking.
Saturday, March 31, 2007
Cecelia Doily, Day 5
Twelve motifs finished. I'm a bit behind schedule, but tomorrow is International Tatting Day and I plan to tat all afternoon! Happy Tatting Day!
Thursday, March 29, 2007
Cecelia Doily, Day 3
Plans are that the finished piece will measure 8 motifs by 6 motifs--48 total. I am in the middle of motif #9 already so that I'm averaging 3 motifs a day. The first strip went fairly fast, but the second strip requires more joins and it is a bit fiddly (is that a word?) to keep the finished part out of the way as I work. It is an enjoyable piece to work on though. I haven't tired of that little "X" yet. Each "X" is worked in one round, too, which is a real plus. If I can continue at this pace, it should be finished in 16 days from the start. That would mean the tatting would be finished by the evening of Wednesday, April 11. I'm dealing with the ends every few motifs so that I don't have a lot of "finish" work to do at the end of the project as I HATE that part. Many of my UFOs are completely tatted and awaiting the finishing touches. I don't consider them done until the final blocking and I can put those last few details off for a very long time.
Monday, March 26, 2007
Busy Shuttles
 Doily Progress: My doily design is in a folder for another time. My daughter decided she'd really like one made with repeated motifs instead of in rounds. Not feeling like designing a square at the moment, I let her choose between Cherie Wheeler's Cecelia Doily (square on left) and Roger aka Freedman's square (on right). We agreed upon Cherie's doily and I'm eager to get it started. The X's work up quickly and easily in one round each.
 Mini Cross Variations: This cross makes a nice little bookmark all by itself, but I also want to use it on the end of the "tail" of other bookmarks. It turns even a little strip of edging into a nice cross bookmark when you tat a tail and put the cross on the end. And since I need a lot of them in a hurry, I thought I'd simplify the pattern while rewriting it to climb out of either end. The result is 3 variations on the same basic stitch counts making the pattern much more versatile for me.
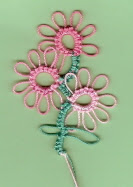
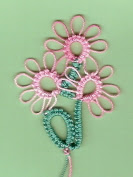
More Flowers: Dancers need an appreciative audience so meet the "Applause Flower" sitting on the sidelines with lots of enthusiasm. And lastly, there is "Justa Flower" whose leaves were formed by making a double picot and then "turning" them in opposite directions.
Friday, March 23, 2007
More Dancing Flowers
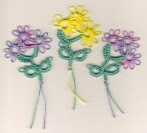
I'm still currently fascinated with Dancing Flowers. Reproducing the same pattern over and over again rarely appeals to me, but so far interest is still holding. I've experimented with joining the blooms at different picots, trying a different color. The pile of flowers is growing nicely though I haven't bothered to count them. I'll quit when I'm tired of them and move on to something else.
Ruth is going to put the pattern in the Tat Calendar soon. Irfanview proved perfect for creating a visual pattern for you and she has the written instructions as well. Until someone else tats a pattern, it is hard to anticipate the problems. I'm counting on you tatters to alert me to any problems you find in the instructions.
Happy Tatting!
Thursday, March 22, 2007
Dancing Flowers

Mini tats were on my "to do" list for yesterday's waiting time--some things to drop in cards of encouragement. Grabbing some thread and my shuttle bag, I dashed out the door to pick up and deliver my family members. When I pulled out my supplies at the hospital, I had everything I needed except the little set of patterns I had put on small cards the night before. A tatter with a shuttle and thread is never fully defeated though. We know how to make rings and chains and connect them together. Right? So I decided to try a flower on a stem. Jan's beautiful flowers (previous post) were my inspiration, but my goal was something much simpler and quicker. I want to make a lot of them fairly quickly. After a few starts and stops and a small pile of wasted thread, I managed to produce two flowers. A thorough search of my car, my purse, my tatting bag, my pockets, etc. couldn't produce those two flowers last night. These three were the results of trying to recreate them from memory. It was my oldest daughter who described them as looking like they are dancing. Tatting over ends and leaving the tails to form their little dancing legs means no ends to finish!
Tuesday, March 20, 2007
25 Motif Challenge
Appointments for various family members have provided me with a lot of waiting room tatting time in the last few days. Since that isn't my best design time, I've been getting some of my own patterns written up, new samples of some of them tatted up, and been playing with some of the patterns I've rediscovered while organizing my pattern collection.


Motifs 21 and 22 are variations on the Flowers on the Vine Bookmark pattern that Katie Verna sent me a long time ago. The original pattern begins with a SCMR and was done all in a variegated thread. I wanted to try two colors so I dropped the SCMR, began with a ring followed by a split ring and then used the shoe lace trick to get the colors where I needed them. She used a series of half stitches for the tail, but I decided to practice my Z-chain. Does it look like a snake crawling out of the garden? I thought so, so I started another version with more picots and a slightly different end before I began the "snake" part.
Motif 23 is a variation on Mark Myers patriotic bookmark that was posted on the internet as his pattern of the month in June 1999. The original version has the blue laced through the bookmark, but I got tired of making twisted chains and opted for one strip down the center.
Are you beginning to wonder if I ever complete a pattern as it is designed? I do, but I confess that I make changes often. Sometimes I get tired of an element or technique as I did this time or I just make a mistake and would rather adapt and move on than go back and fix it. In the case of Katie's bookmark, the designer's idea triggered other possibilities in my mind that I just HAD to try.
Motif 24 is Kim Millar's Laced Bookmark. I wanted to produce something very close to the original look, but the only threads I had in a variegated blue were a size 10 and a size 80 and I opted for the size 10. I followed the pattern exactly. (You see! I CAN do it.) The size 10 makes a much bulkier piece than I would prefer but I really love the whole look. Maybe I should try it again in that size 80. Kim's original was laced with a bright yellow. After working Mark's patriotic bookmark, I was still in the mood for more red, white, and blue and the red thread was close at hand.
Motif 25 is Betsy Evans Small Tatted Heart designed in 1998. I had Betsy's written instructions and a diagram. I made this tatted sample to store with the pattern to remind me what it should look like. Betsy's instructions and diagram were very easy to follow. It is definitely a pattern that I'll use again. In fact, all of these patterns were a pleasure to tat--definite keepers.
I believe that finishes the 25 motif challenge for me, but there is still plenty I want to get accomplished this year. So check back now and then to see what I've been doing and drop me a note. I love to read your comments.
Saturday, March 17, 2007
Motifs 19 & 20

I've made great progress on getting my pattern collection into my computer. And in doing so, I've rediscovered so many exciting patterns that I've never used. The heart motif shown is one of them. It is designed by Heidi Nakayama and was published in the September 1995 issue of KNOTS! Ring only patterns are great for emptying a shuttle and I practiced directional tatting as I worked it up. The hat motif is a simple pattern of mine that will be shared in the TatCalendar some time in the future. You've seen the motif before in a bookmark.
Have a great weekend!
Monday, March 12, 2007
A New Tatter
What is the best thing to do when one finds oneself on a bus full of teenagers headed to a concert? Tat, of course! I carried along those shuttles that needed to be emptied and started making butterflies and other small items as soon as the wheels started rolling. One of the other moms had watched her grandmother tat and wanted to learn, but had never been able to get it right. I handed her the shuttle with the varigated Manuela size 10 and had her flipping her knots in no time. She was making some pretty picoted rings when she gave up the shuttle. The concert was great, too!
Thursday, March 8, 2007
Tuesday, March 6, 2007
The start of a new doily.
When my oldest daughter was in her early teens and still a fairly new tatter, I participated in my first doily round robin. Sarah really wanted to get in on the fun so I suggested she and I do a little round robin of our own. The lavender and white doily is one of our finished pieces. Using size 30 thread, it measures approximately 6 inches. Now many years later, she has asked me to tat a rectangular doily for her and I thought it would be rather special to use some of the elements of the doily we made together in this new piece. It would be very easy to turn it into a square, but she needs something a little wider than it is tall for this particular table. Here you see the original piece and the new center for the rectangle. I really like the mask-like appearance of the new center.


Monday, March 5, 2007
Motif #11 and doily in progress
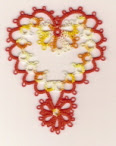 Motif #11: My daisy picots are looking better! I still have a bit of trouble with the last if those picots closing up tighter than the first, but this heart looks much neater than my last. The link to the pattern is in my last post.
Doily Progress: My oldest daughter has been wanting a slightly rectangular doily for over a year and I decided to finally get busy on it. I'm reworking a circular roundrobin pattern she and I created when she was in her early teens. Split rings and rings off chains made it possible to do the first three rounds all in one CTM round (that is, if I hadn't run out of thread on the shuttles!). Problem solving is so much fun to me. Making this round doily into a rectangle is offering a nice challenge--so much more fun than just working a pattern! Our original was done in lavender and white, but this one is in ecru and white.
The dog I was working on is in the UFO pile for now.
Happy tatting!
Friday, March 2, 2007
Trying new techniques and refreshing rusty ones.


Motif #6 and #7: I finished the green bookmark I mentioned in a previous post and completed another of Jan's flowers.
Motif #8: The Meshed Heart by Wally Sosa wa
 s a fun pattern to work up and great for practicing directional tatting. I'd become very rusty at that technique, but working Jan's flowers made me want to experiment a bit more and this heart was perfect for the task.
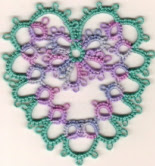
Motif #9: My first attempt at Daisy Picots with Ruth Perry's version of Jon's Daisy Picot Heart. I had a bit of trouble keeping some extra thread from appearing between the daisy picots so I definitely need to practice. That is scheduled for tomorrow morning.
Motif #10: The only tatting I could find in Madame Worth's New Manual of Fancy Work. A Guide to
 the Various Kinds of Kensington Embroidery and Painting. Embroidery, Drawn Work, Lace Work, Knitting, Tatting, Crochet Work, Net Work, Etc., Etc., Etc. Including Practical Directions for Making Wax Flowers and painting on Silk, Etc., Etc. 200 Illustrations (what a name, huh?) was a picture of a ring only edging with no instructions. It looked rather intriguing though and this button cross was the result of my play. This was also my first attempt at tatting around a button. Placing the button was a great deal harder than I expected. My first effort was cut off and thrown in the trash can! This 2nd attempt came out a bit better. I found Madame Worth's book in pdf form at Antique Pattern Library
Happy Tatting!
Subscribe to:
Posts (Atom)
